Delivery Orders
This document explains the flow and management of Delivery Orders in the Jova POS system, from creation to delivery status.
Delivery Order Flow
The general flow is:
- Access the Transactions → Delivery Orders menu.
- Select a transaction to follow up on or create a new transaction.
- Fill in delivery information details.
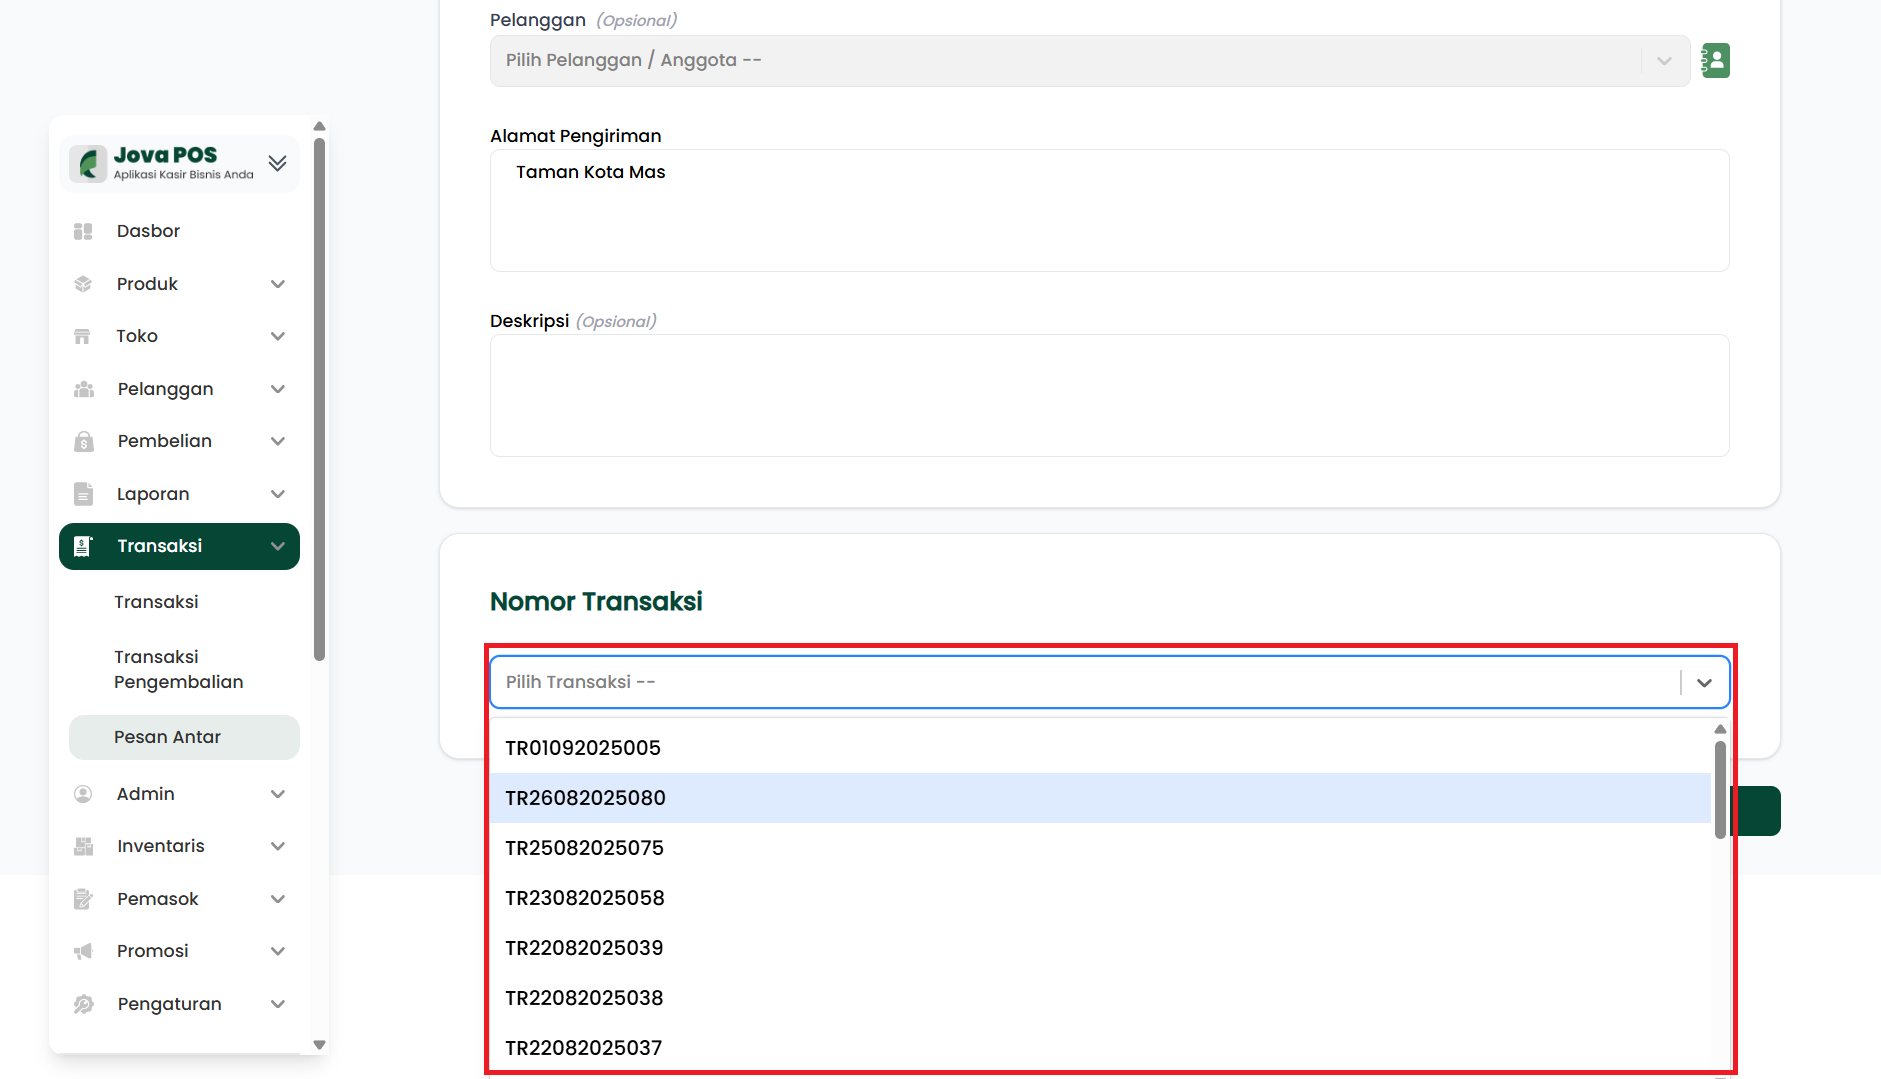
- Select the related transaction to process further.
- Click Save.
- The transaction status will change based on the approval and delivery steps.
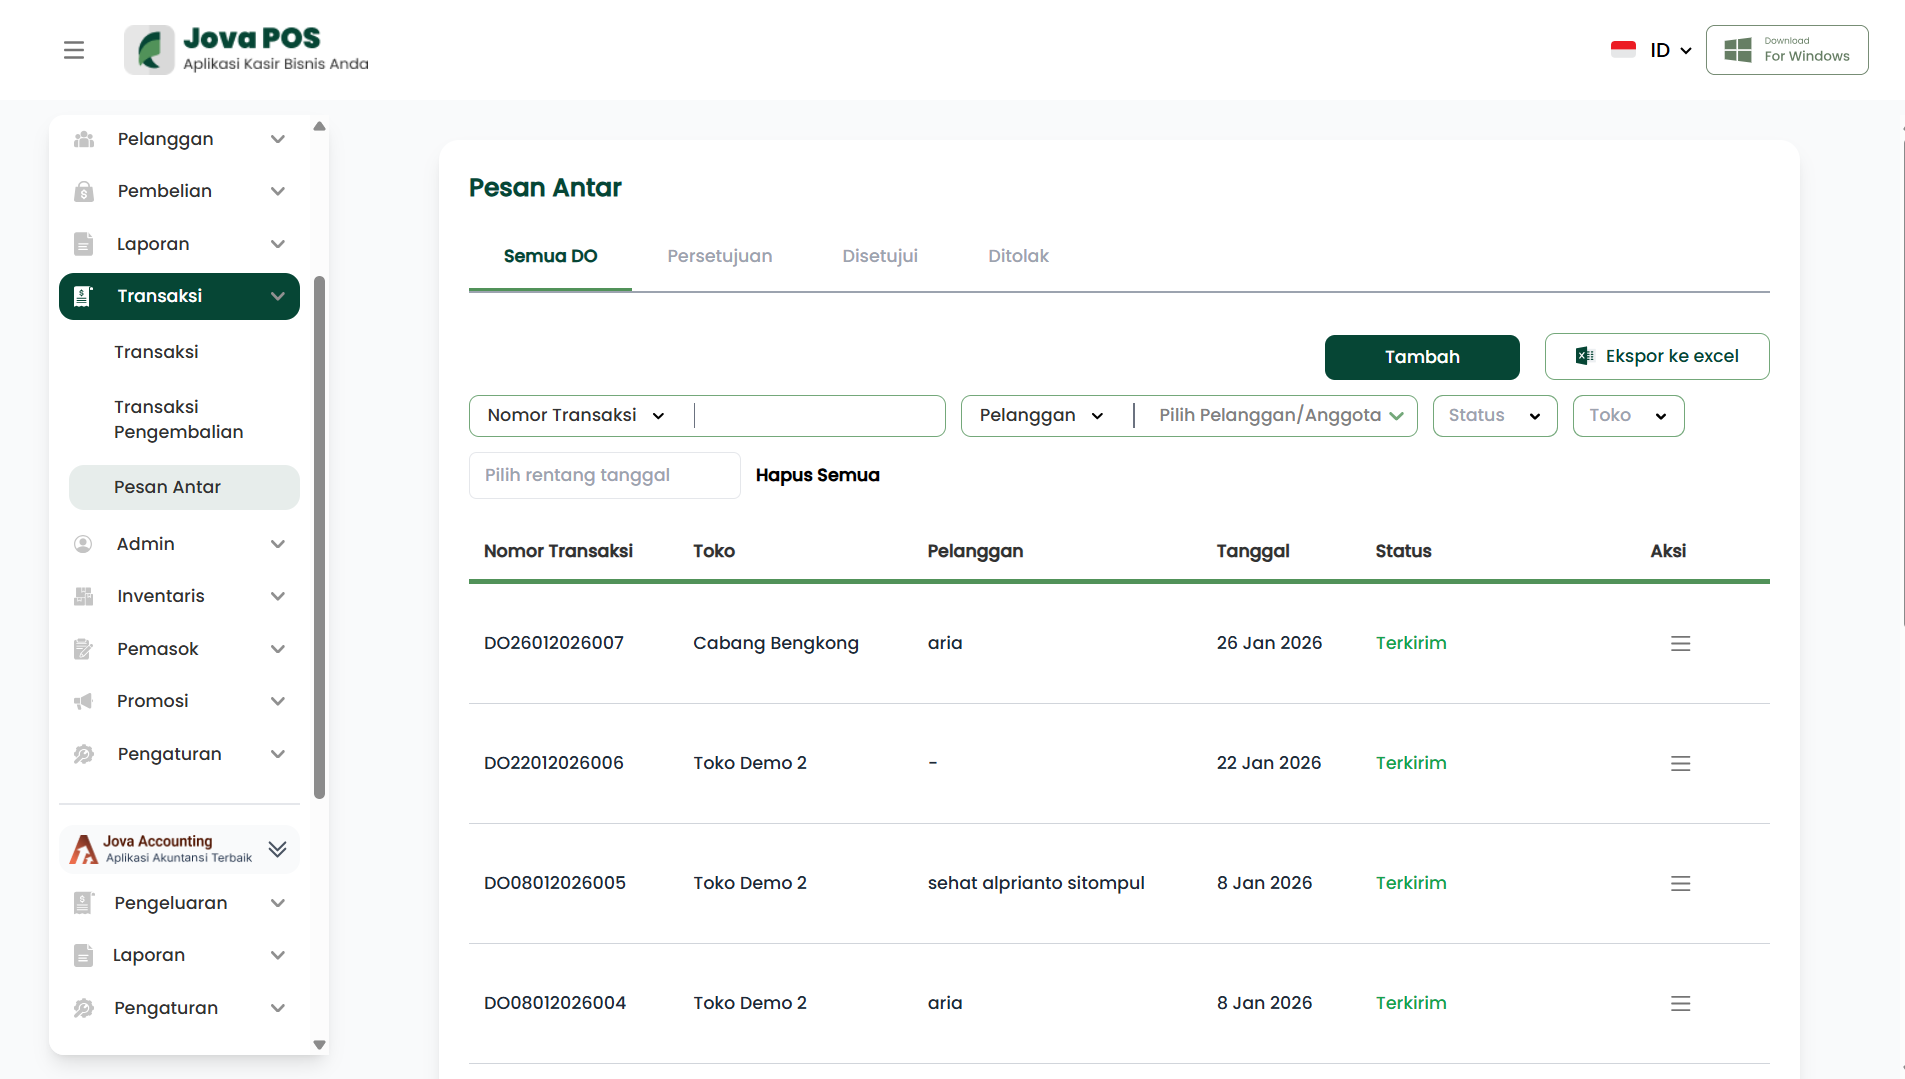
1. Accessing the Delivery Orders Menu
- In the sidebar, click Transactions.
- Select Delivery Orders.
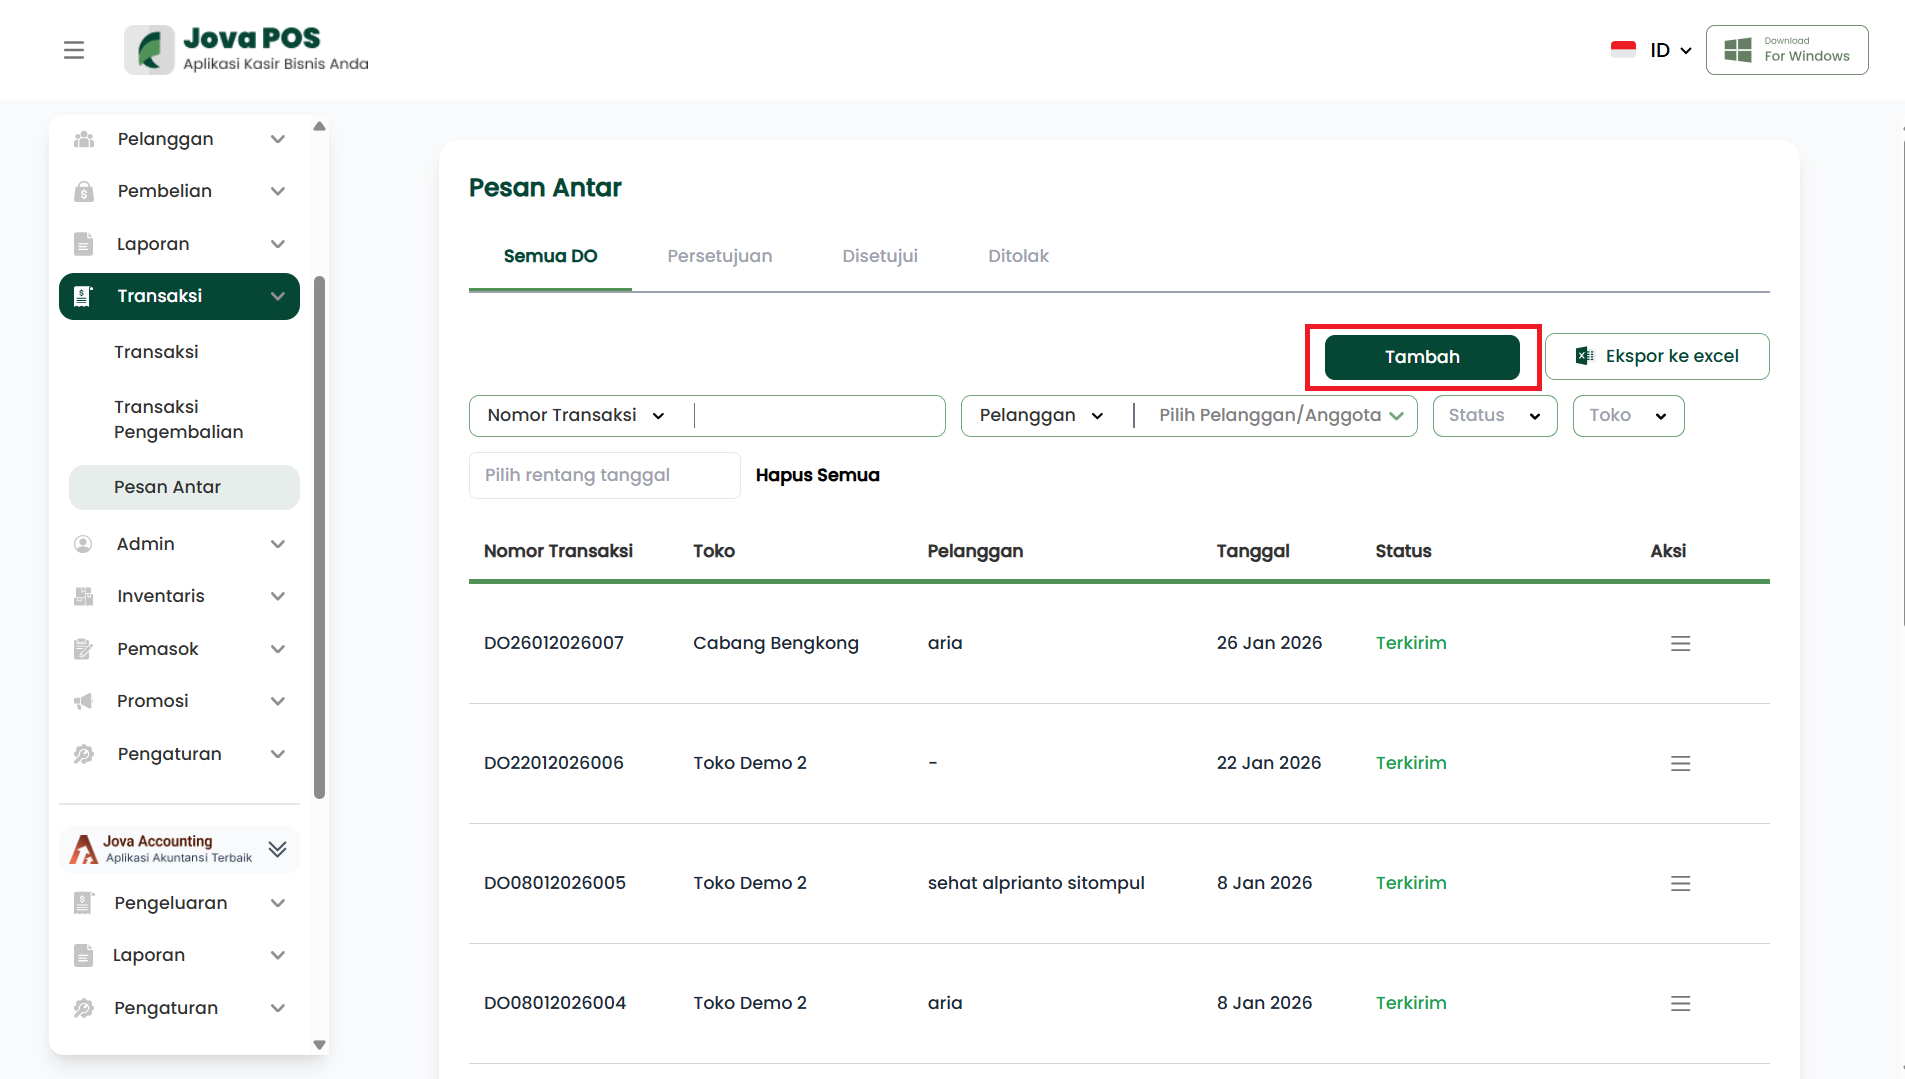
2. Adding a New Delivery Order
To add a new transaction, click the Add button at the top of the page.
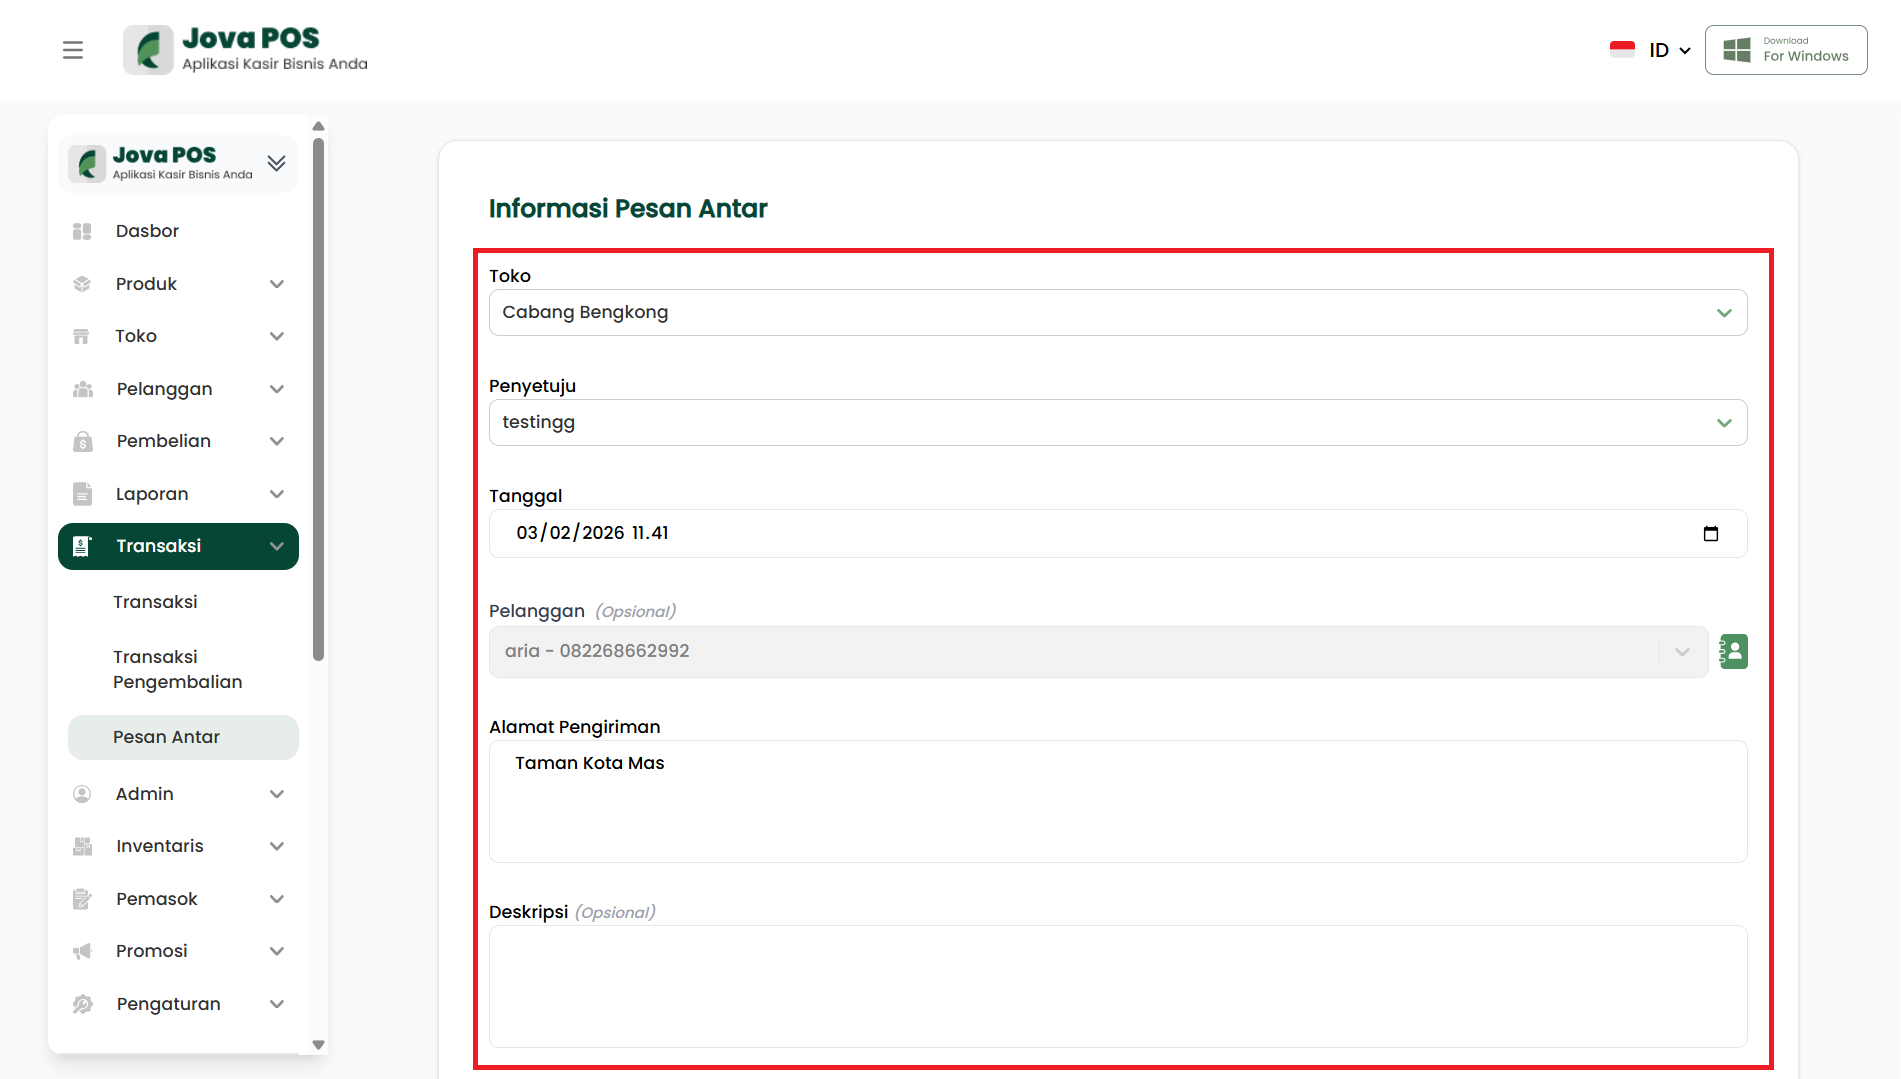
3. Filling in Delivery Order Information
In the form that appears, fill in the following details:
- Transaction Number: Select the related transaction number.
- Customer: Select the customer or member name.
- Delivery Address: Enter the delivery address for the goods.
- Description: Optional to add further information.
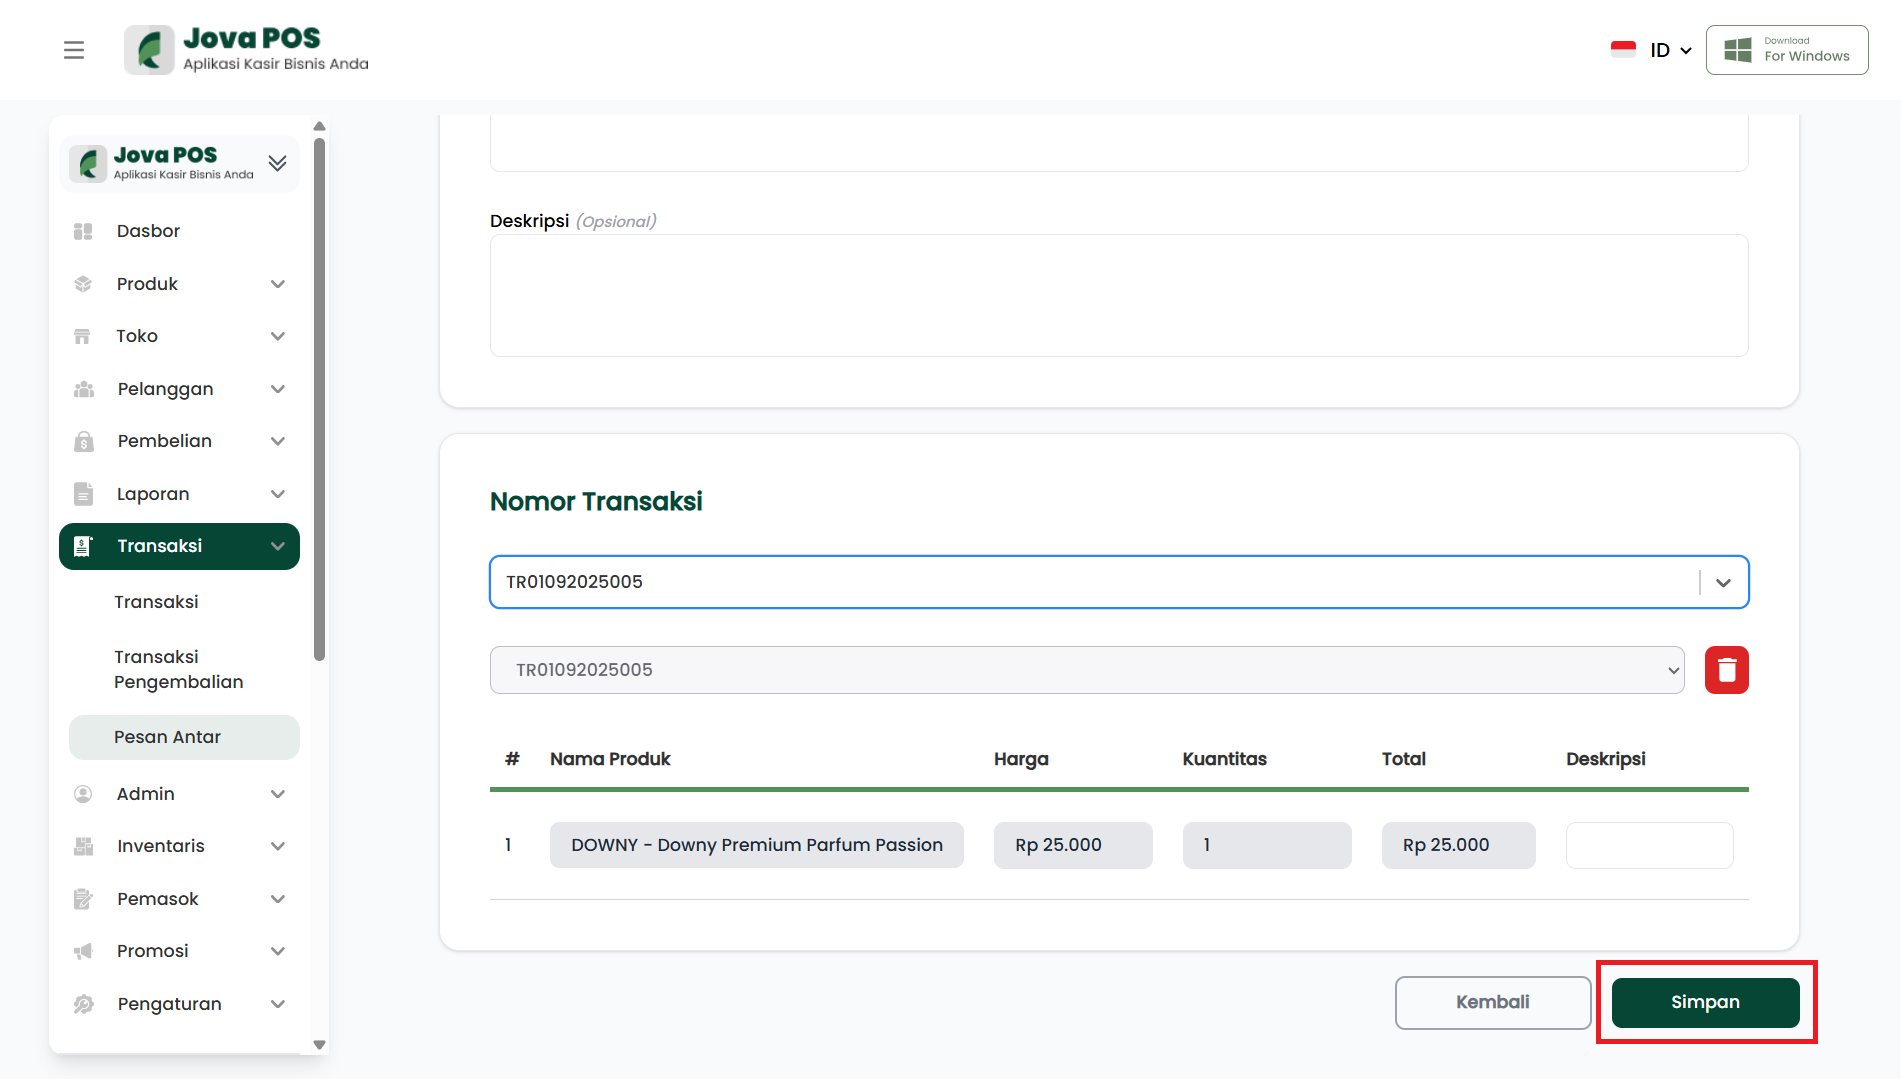
4. Selecting Products to Deliver
Select the products to deliver from the existing transaction list.
- Product Name: Select the product name to deliver.
- Quantity: Specify the quantity of products to deliver.
- Unit: Specify the product unit.
5. Save and Continue
After filling in all required information, click the Save button to complete the delivery process.
6. Delivery Status
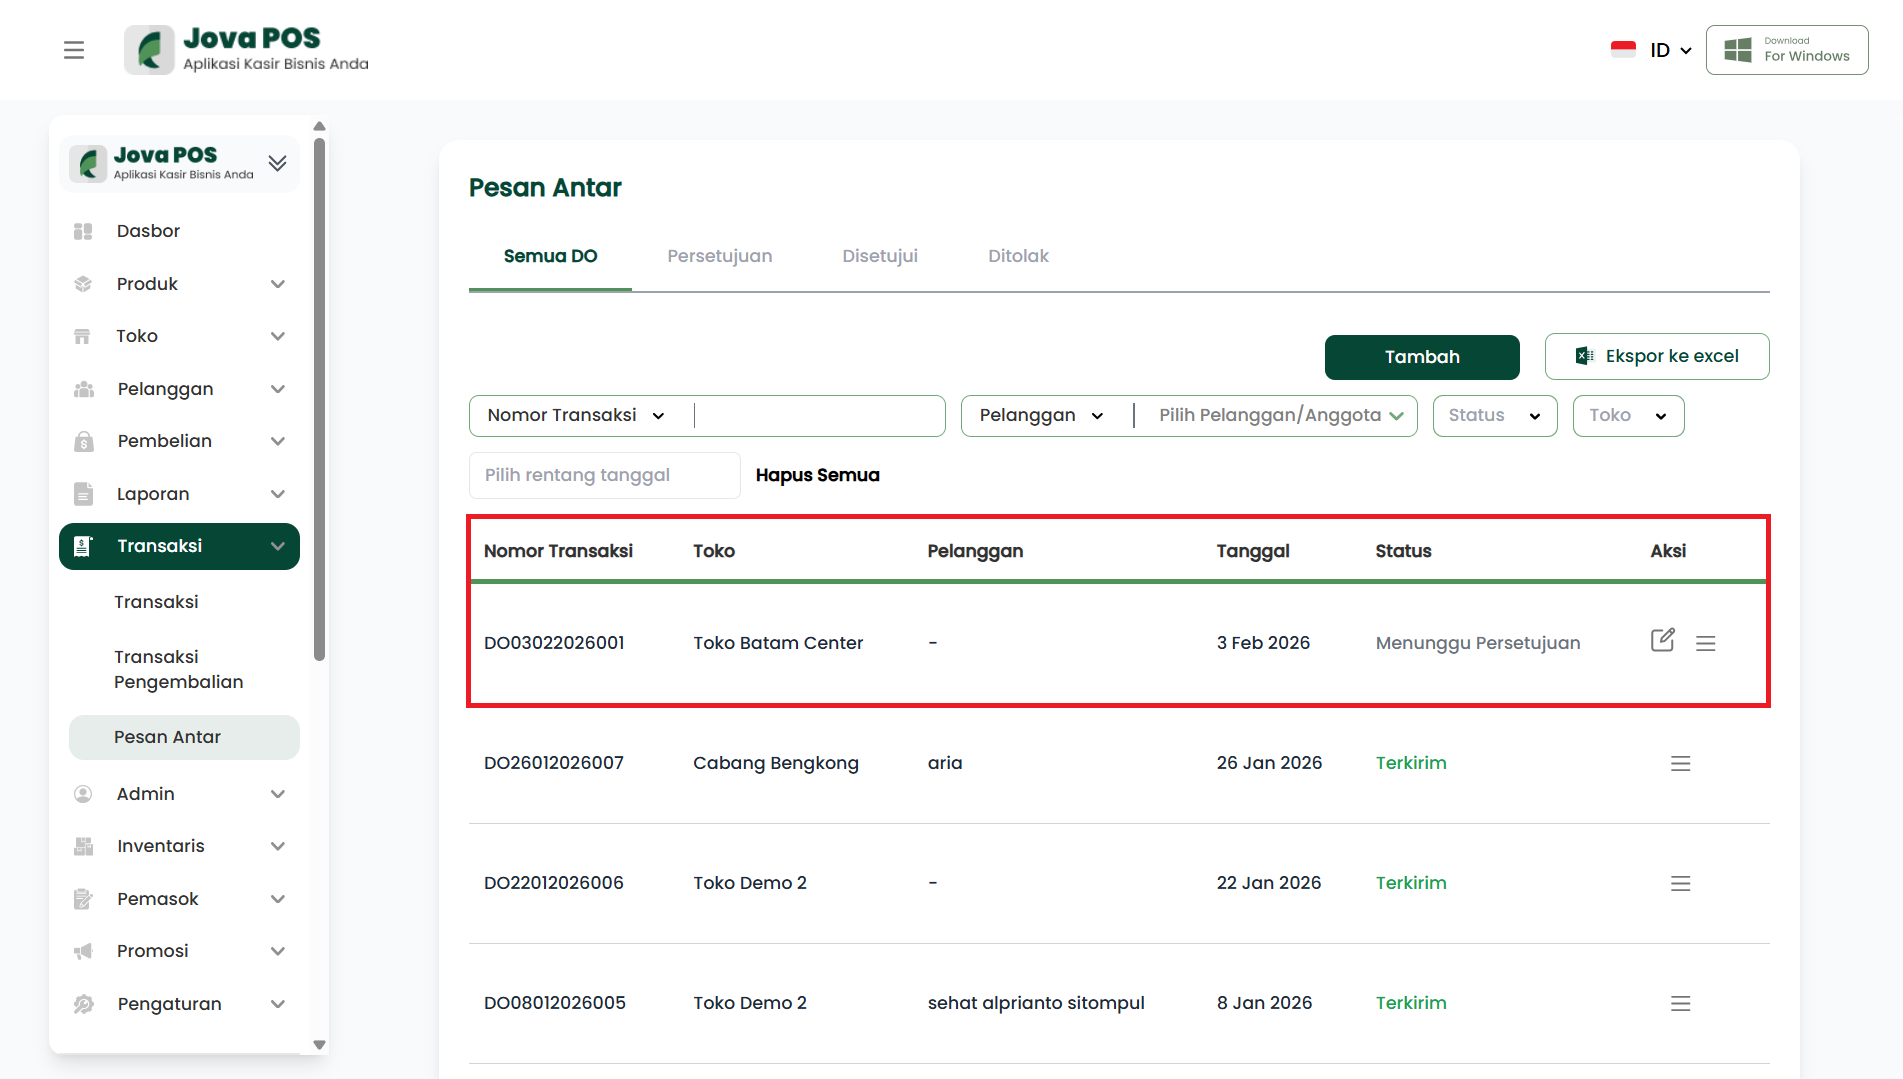
After saving the transaction, you can view the delivery status in the main table. This status will indicate whether the delivery is pending approval, sent, or rejected.
7. Actions on Delivery Order Table
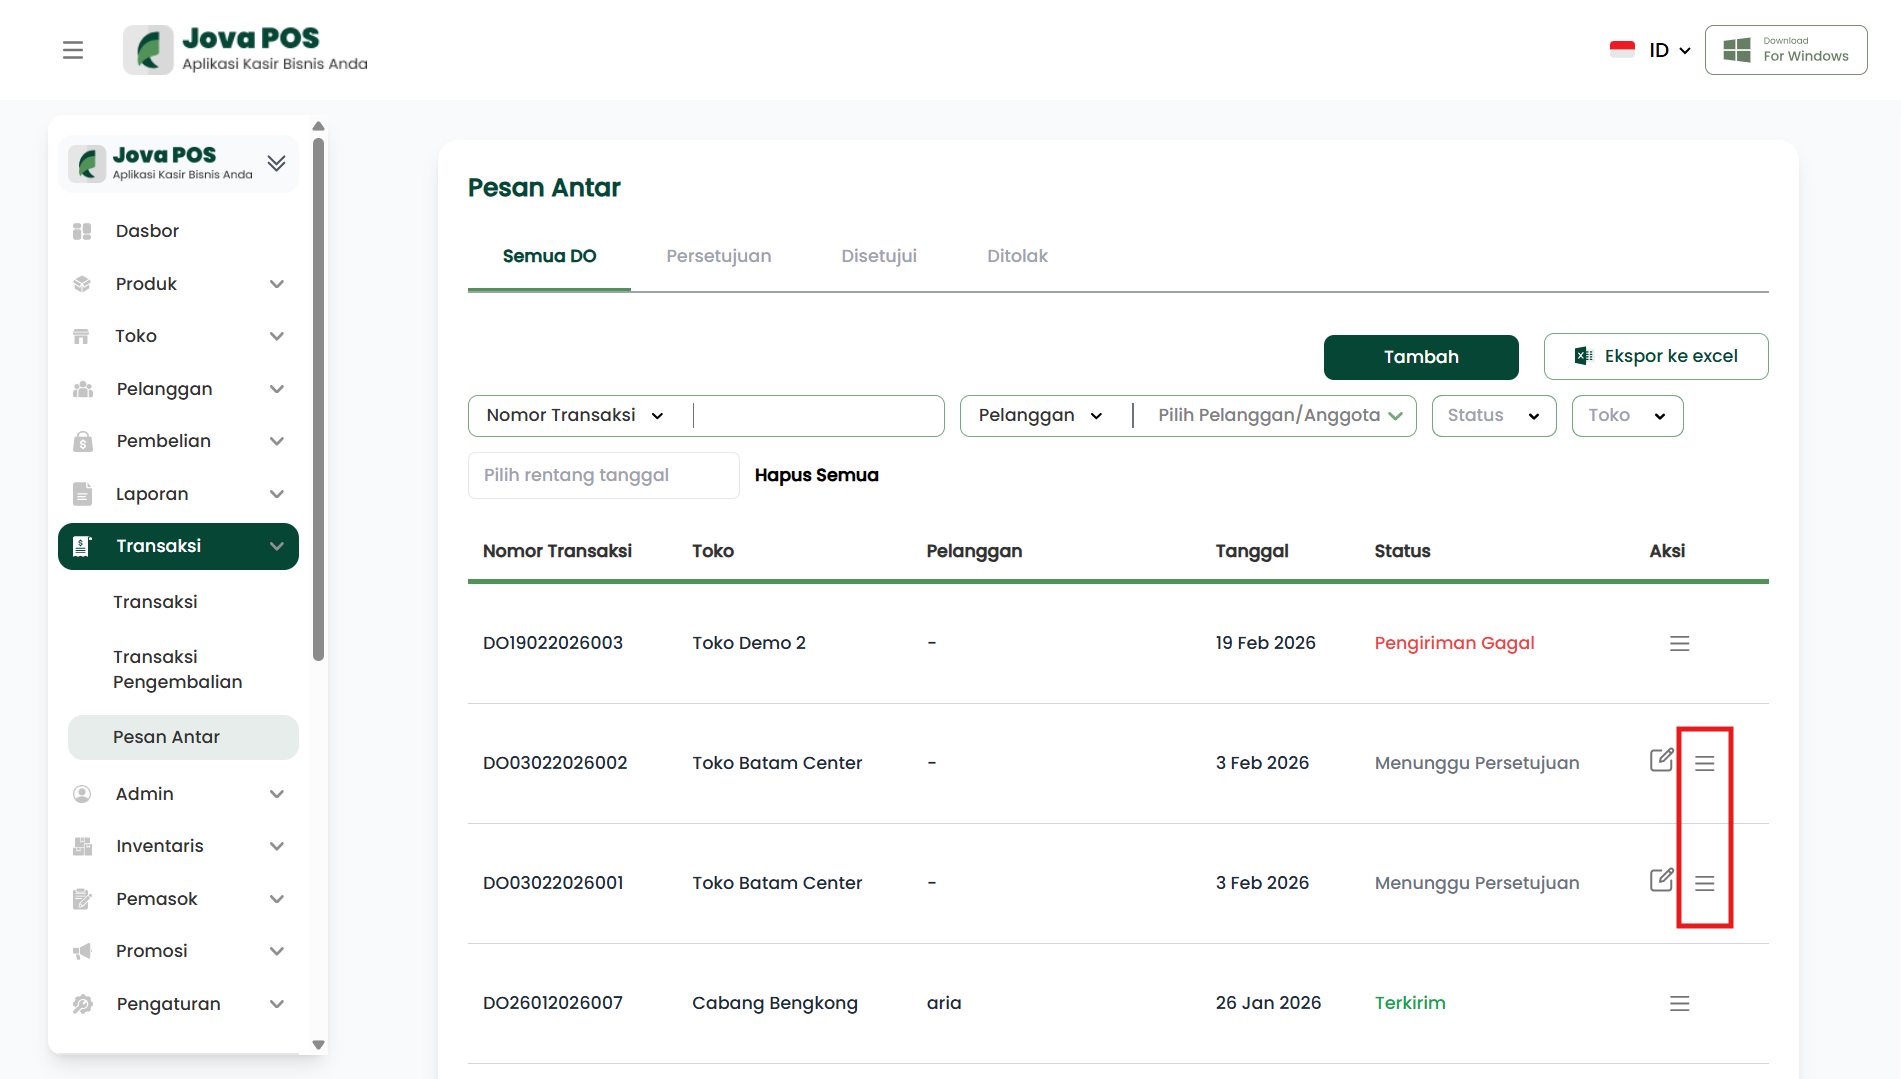
On the Transactions → Delivery Orders page, each row has an Action column.
Generally there are 2 actions:
- Edit (pencil icon) to open and change DO details.
- Menu (three-line icon) to see advanced options for the DO.
Note:
- If you don't see a specific button, it's usually because the DO status has not yet reached the appropriate stage.
8. Delivery Order Data Tabs
At the top of the page there are tabs:
- All DO: displays all data.
- Approval: DOs awaiting approval.
- Approved: DOs that have been approved.
- Rejected: DOs that have been rejected.
Use these tabs to speed up searching based on workflow.
9. Opening Delivery Order Details
- In the table, select the DO you want to process.
- Click Edit or Menu in the Action column.
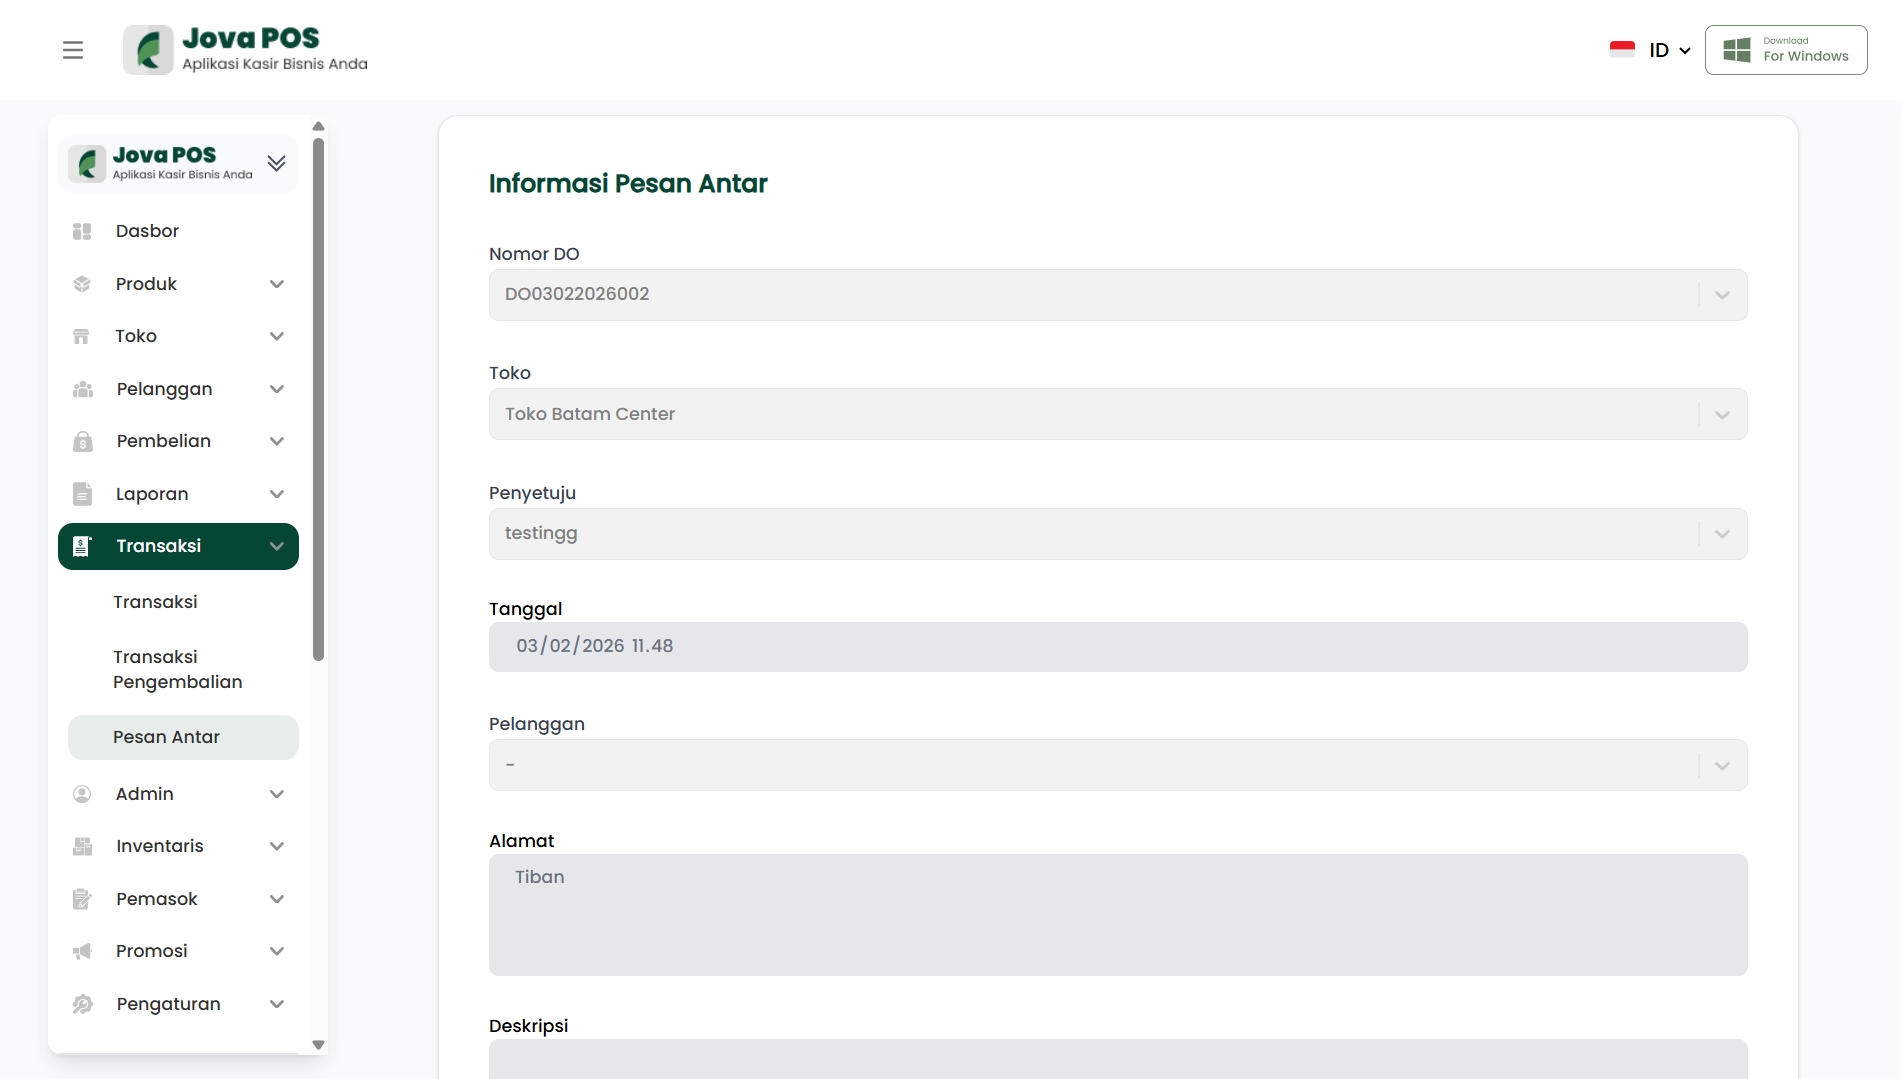
- The system displays the Delivery Order Information page.
Commonly visible sections:
- DO Information (DO Number, Store, Approver, Date, Customer, Address, Description).
- Transaction details and product list.
- Action buttons at the bottom.
10. DO Approval Process
At the approval stage, the buttons usually available:
- Back: return to the list.
- Reject: reject the DO.
- Approve: approve the DO.
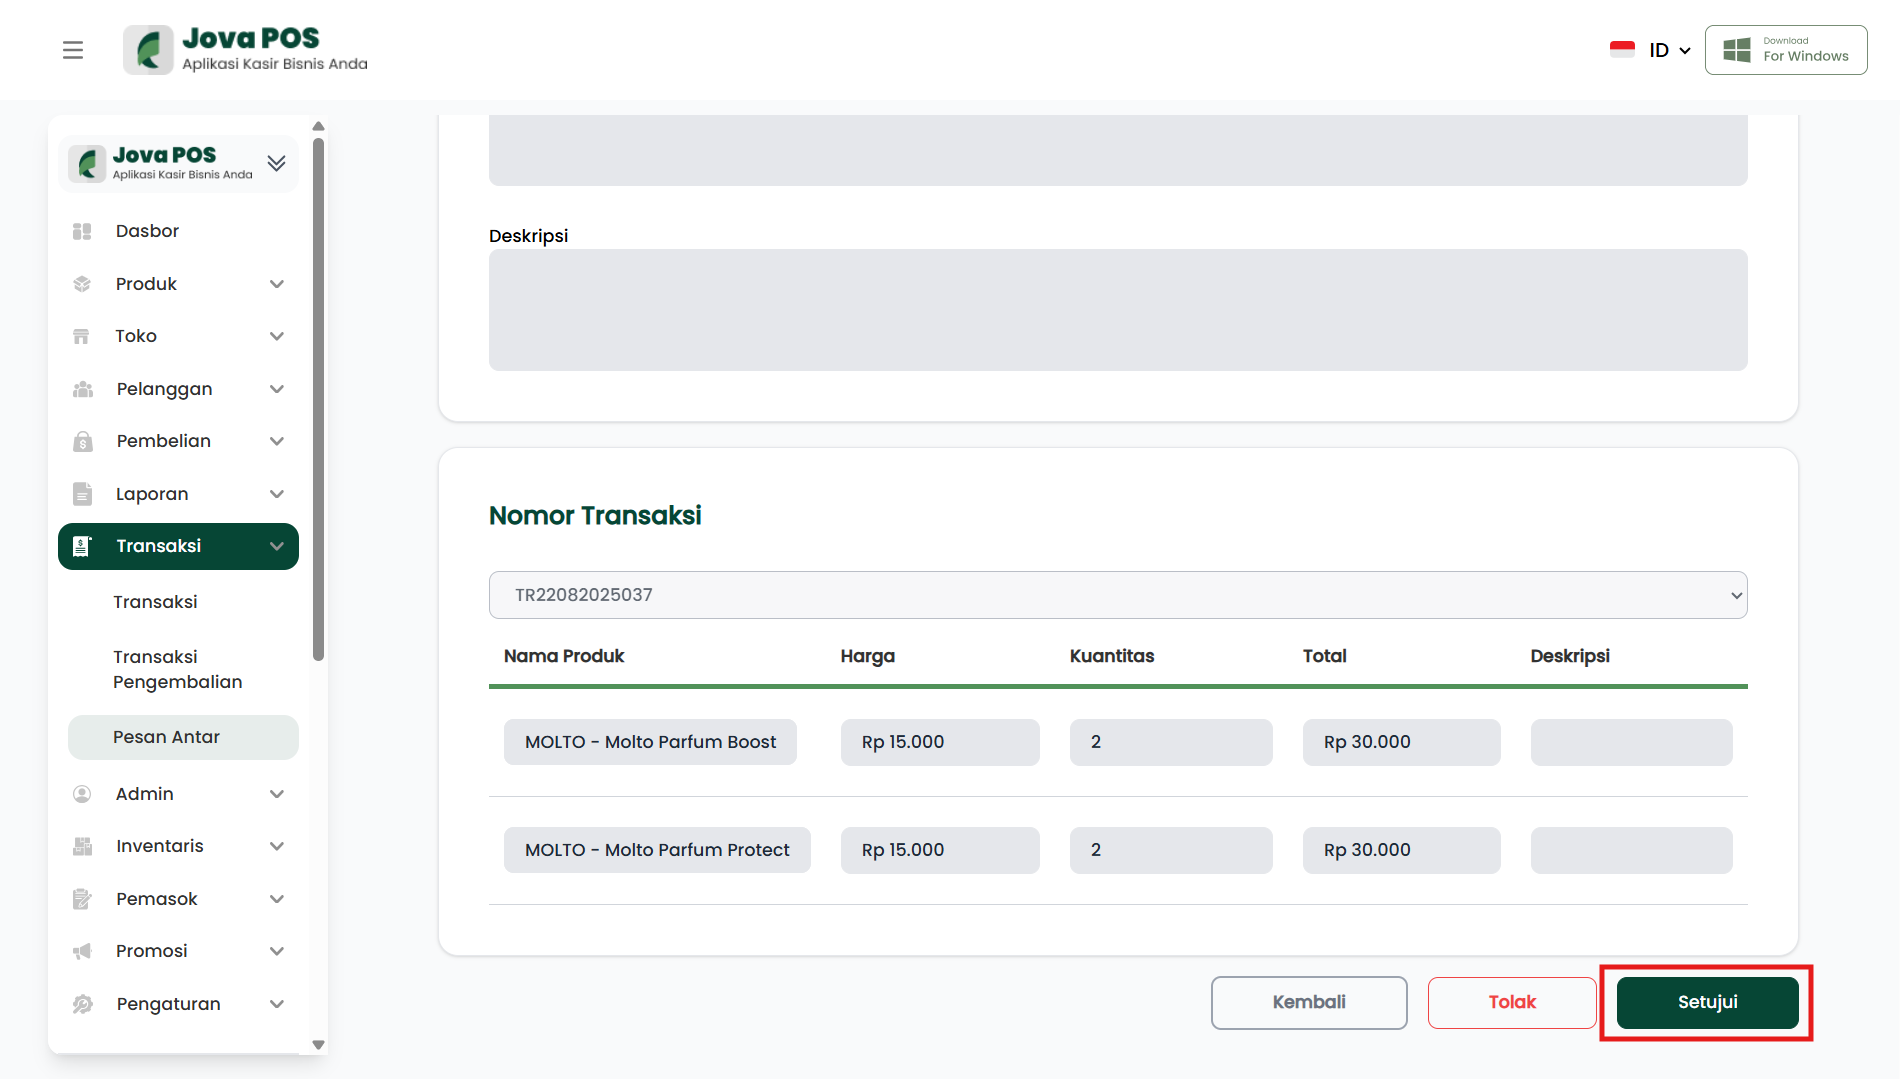
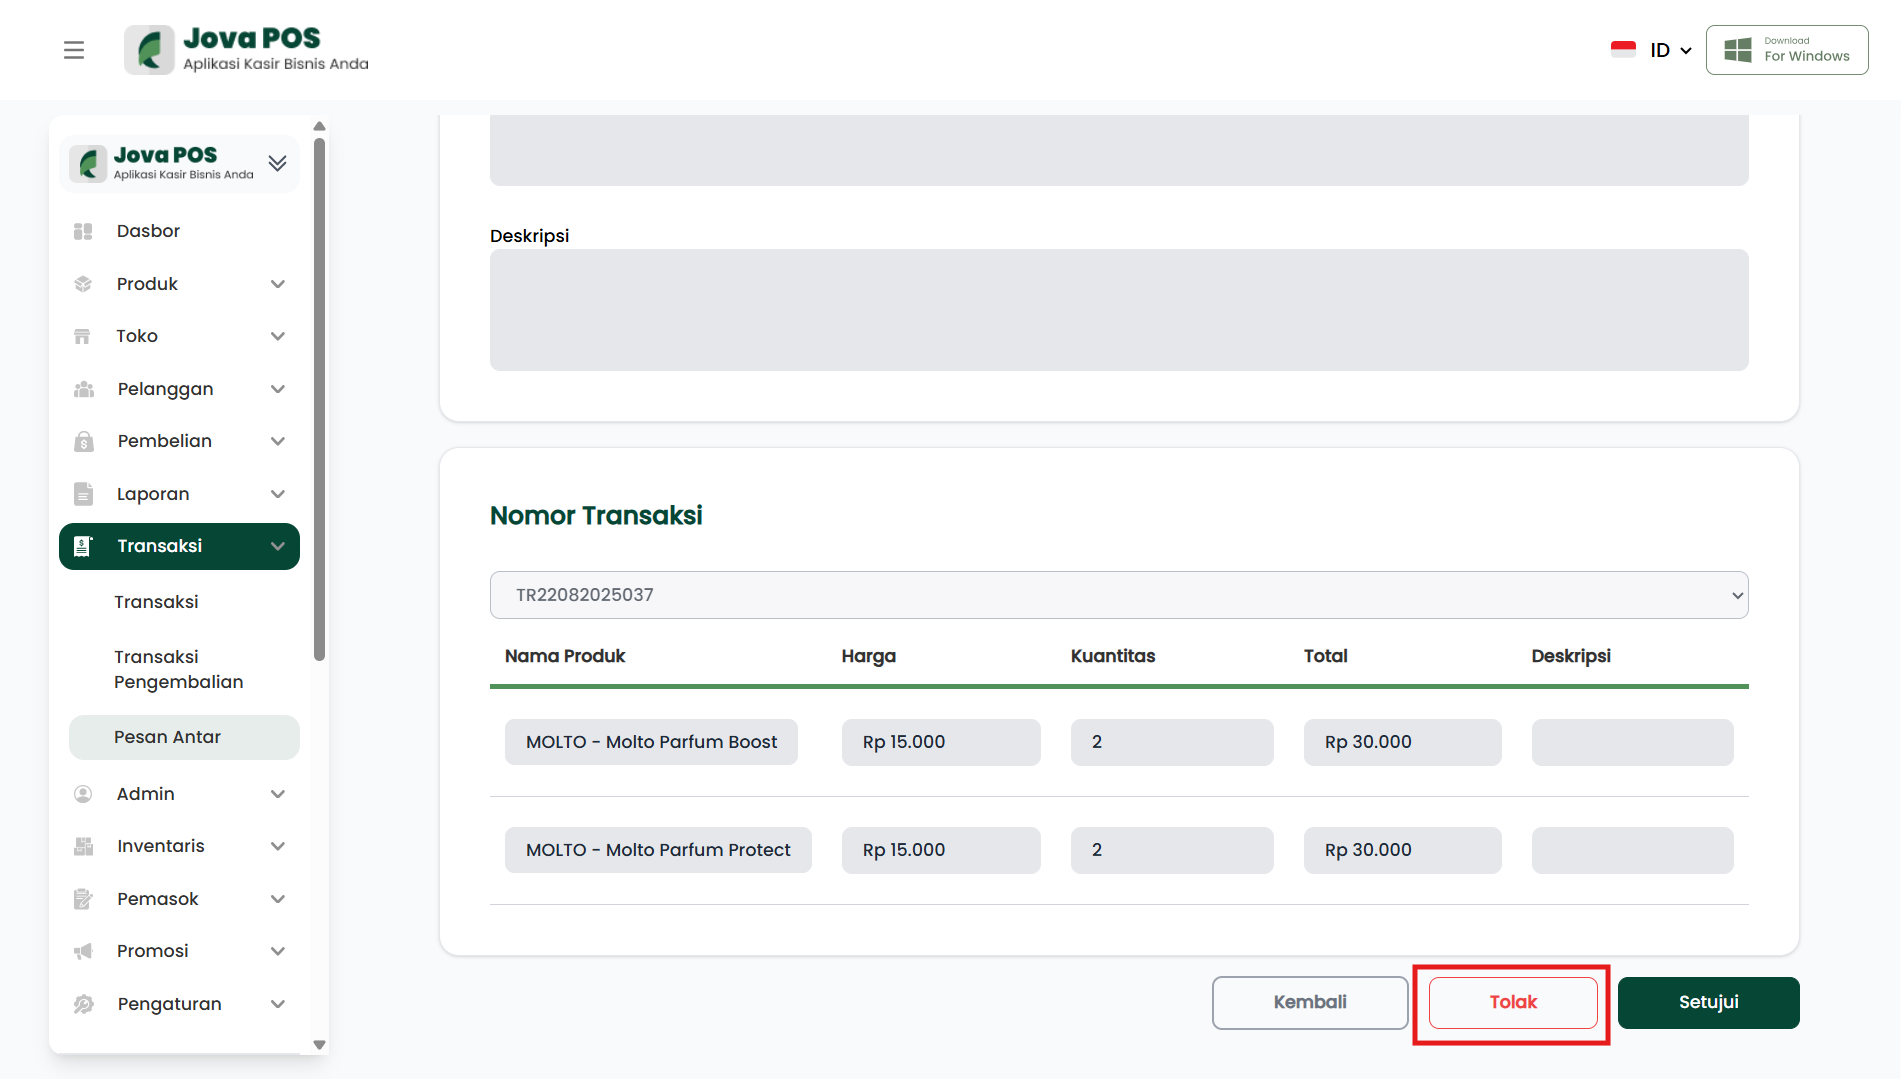
Action results:
- If you click Approve, the DO status changes to Approved.
- If you click Reject, the DO status changes to Rejected.
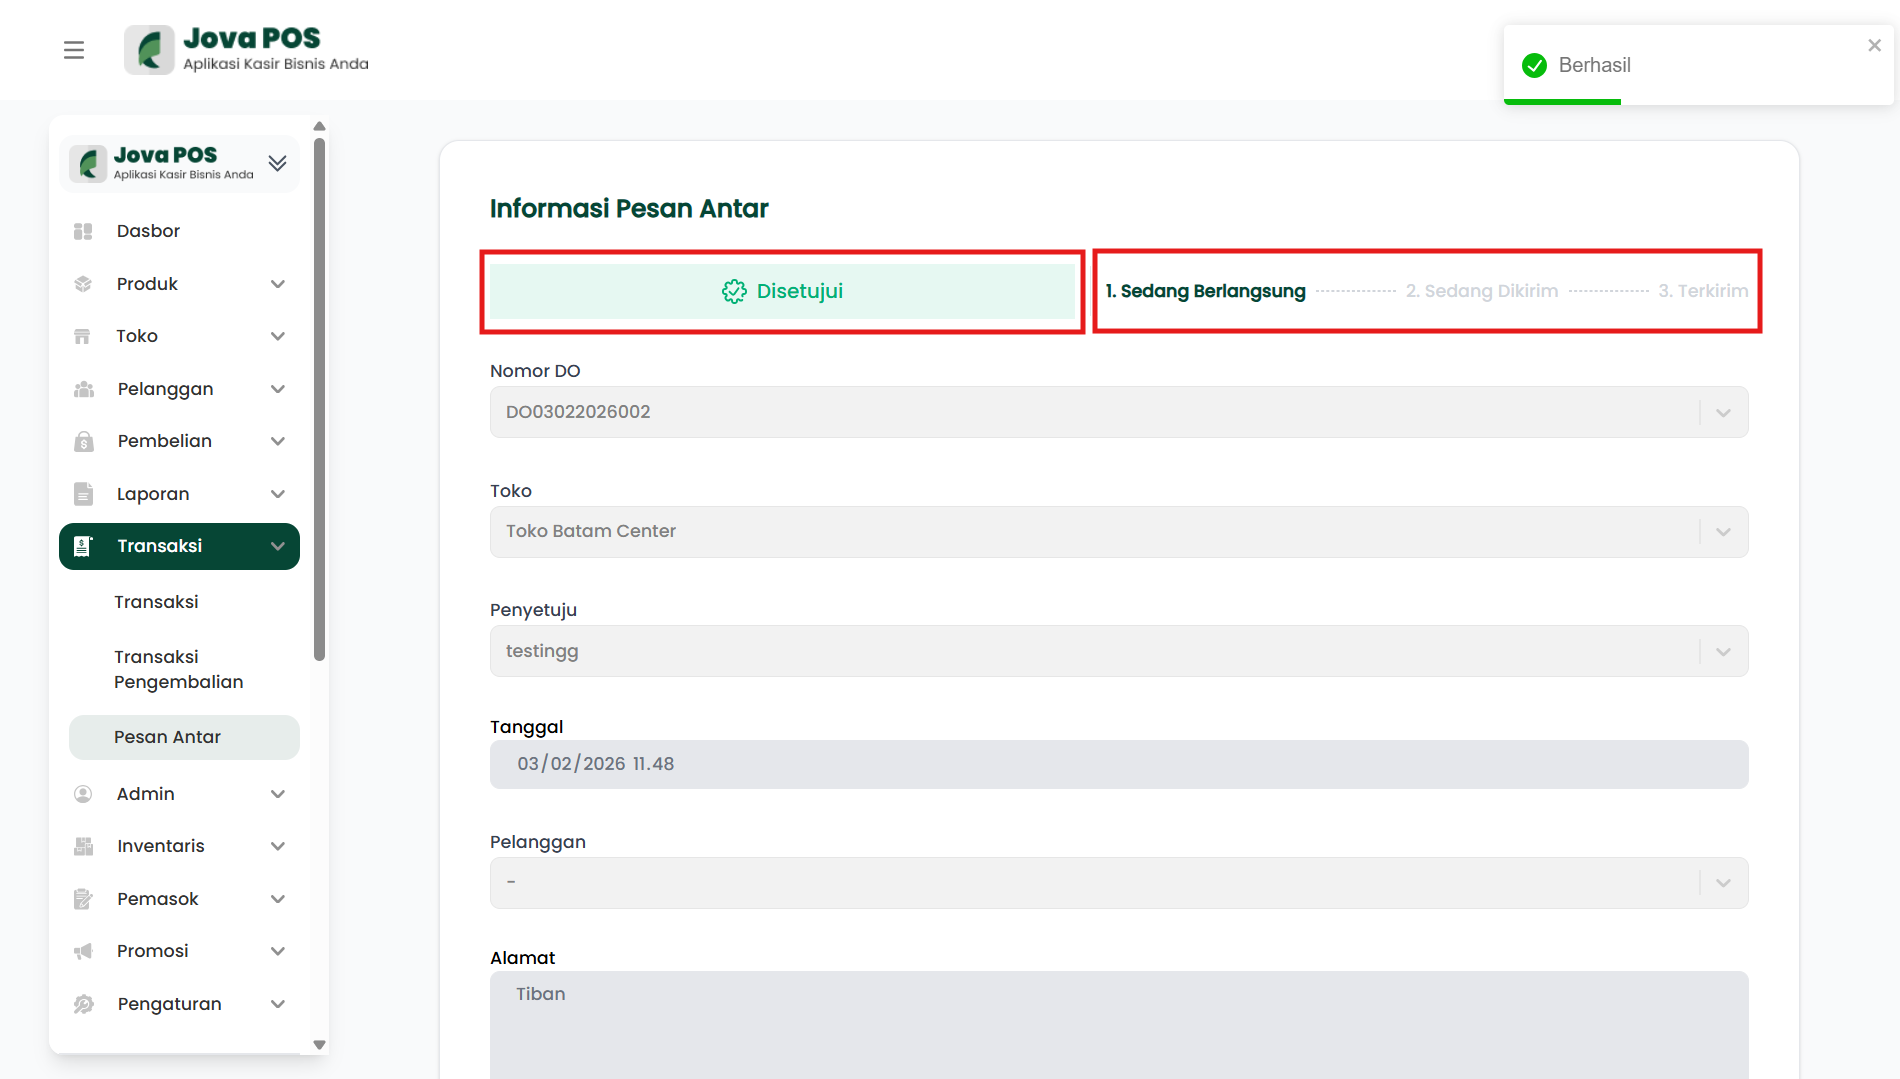
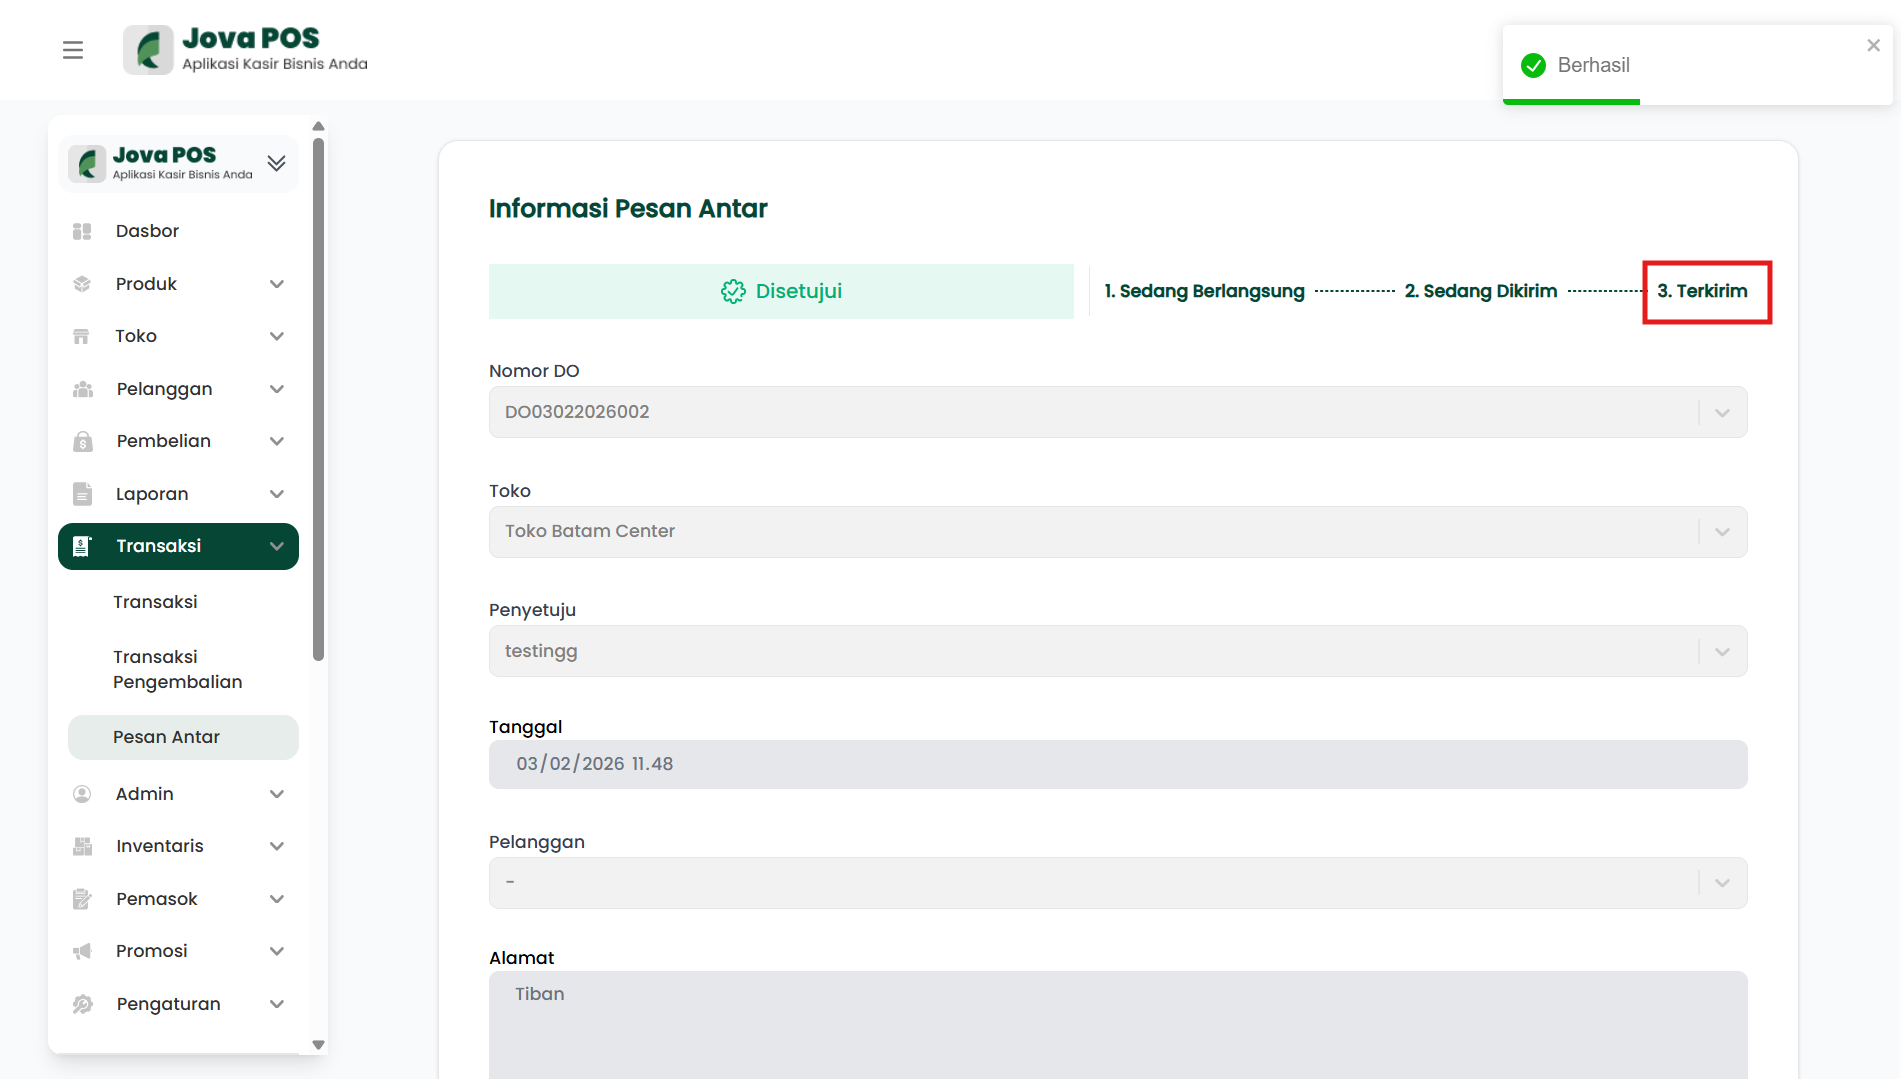
11. Status Indicator and Delivery Stage
After the DO is approved, the detail page displays:
- Status badge (e.g.: Approved)
- Process stages:
-
- Ongoing
-
- Being Delivered
-
- Delivered
-
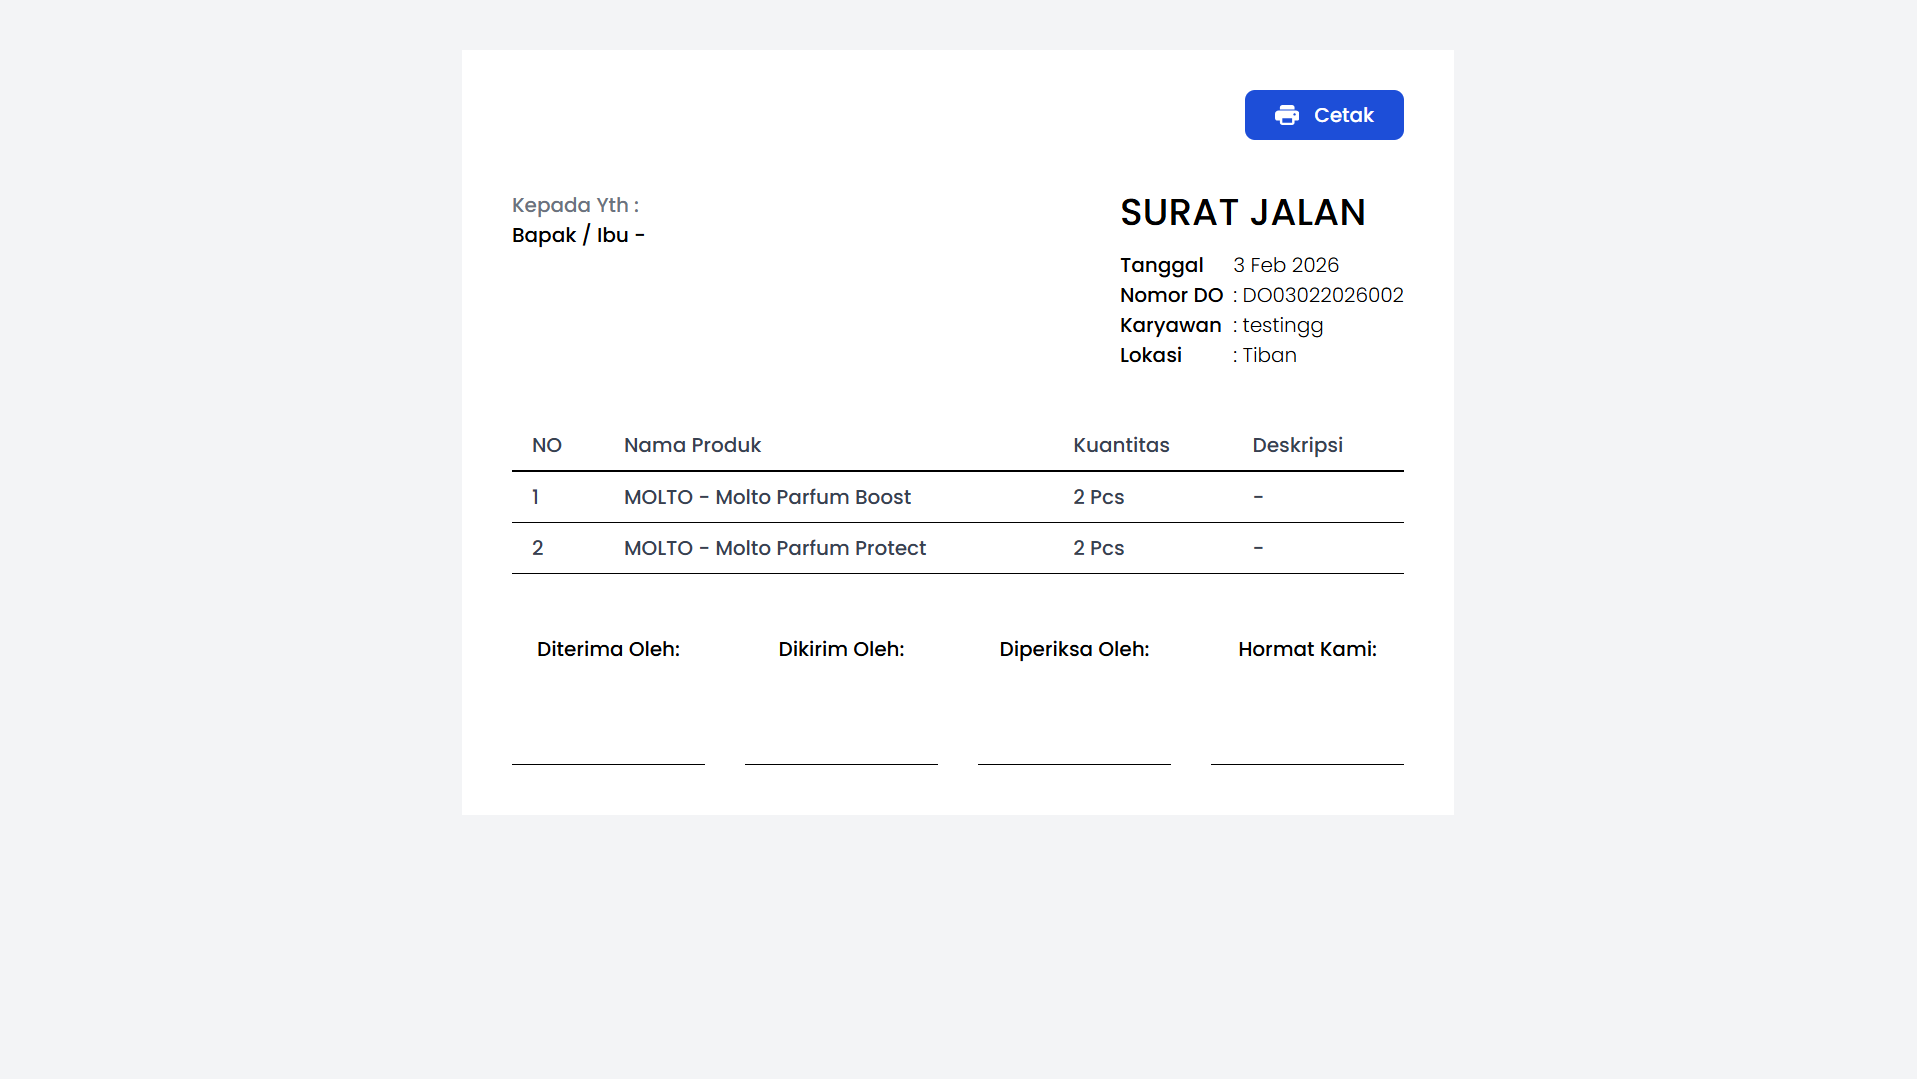
12. Delivery Invoice (Waybill)
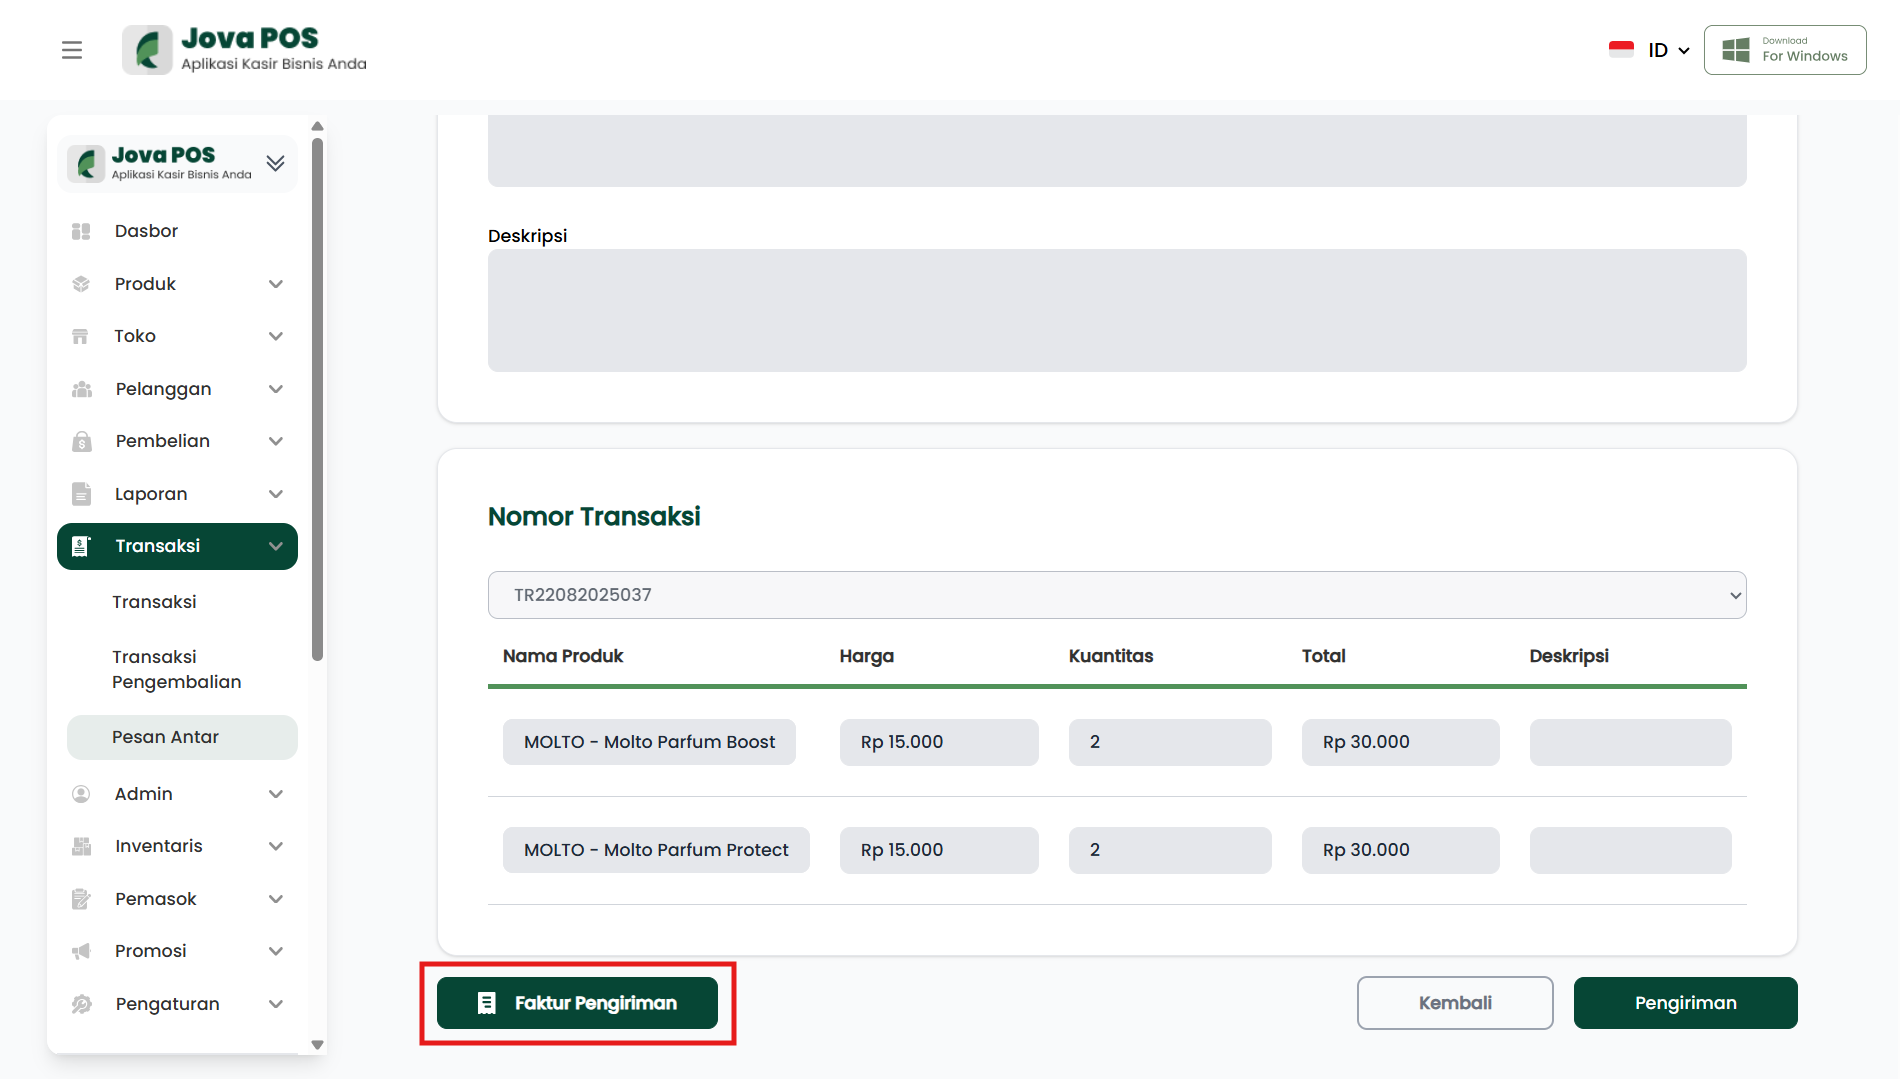
If the DO has been approved, the Delivery Invoice button will appear.
- Click Delivery Invoice.
- The system displays the Waybill document.
- Click Print if you want to print.
13. Starting Delivery
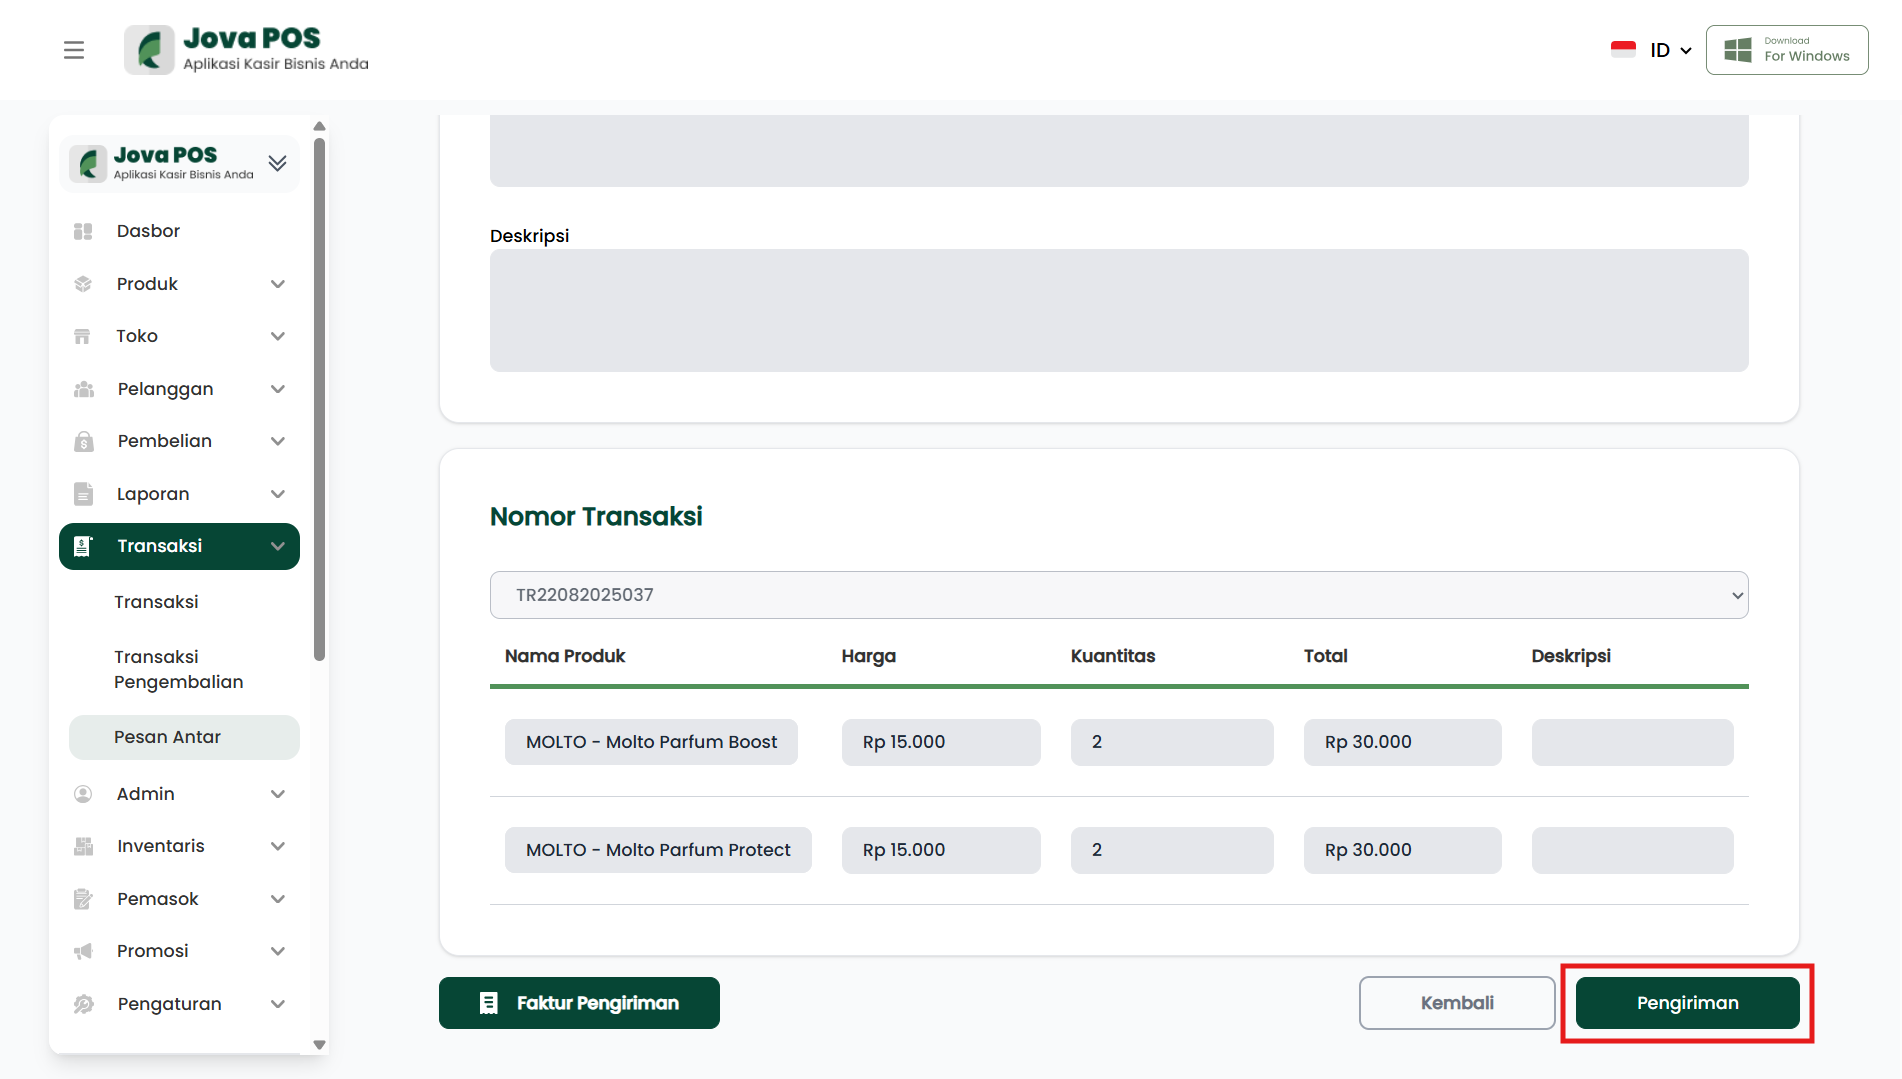
If the DO has been approved, the Delivery button will be available.
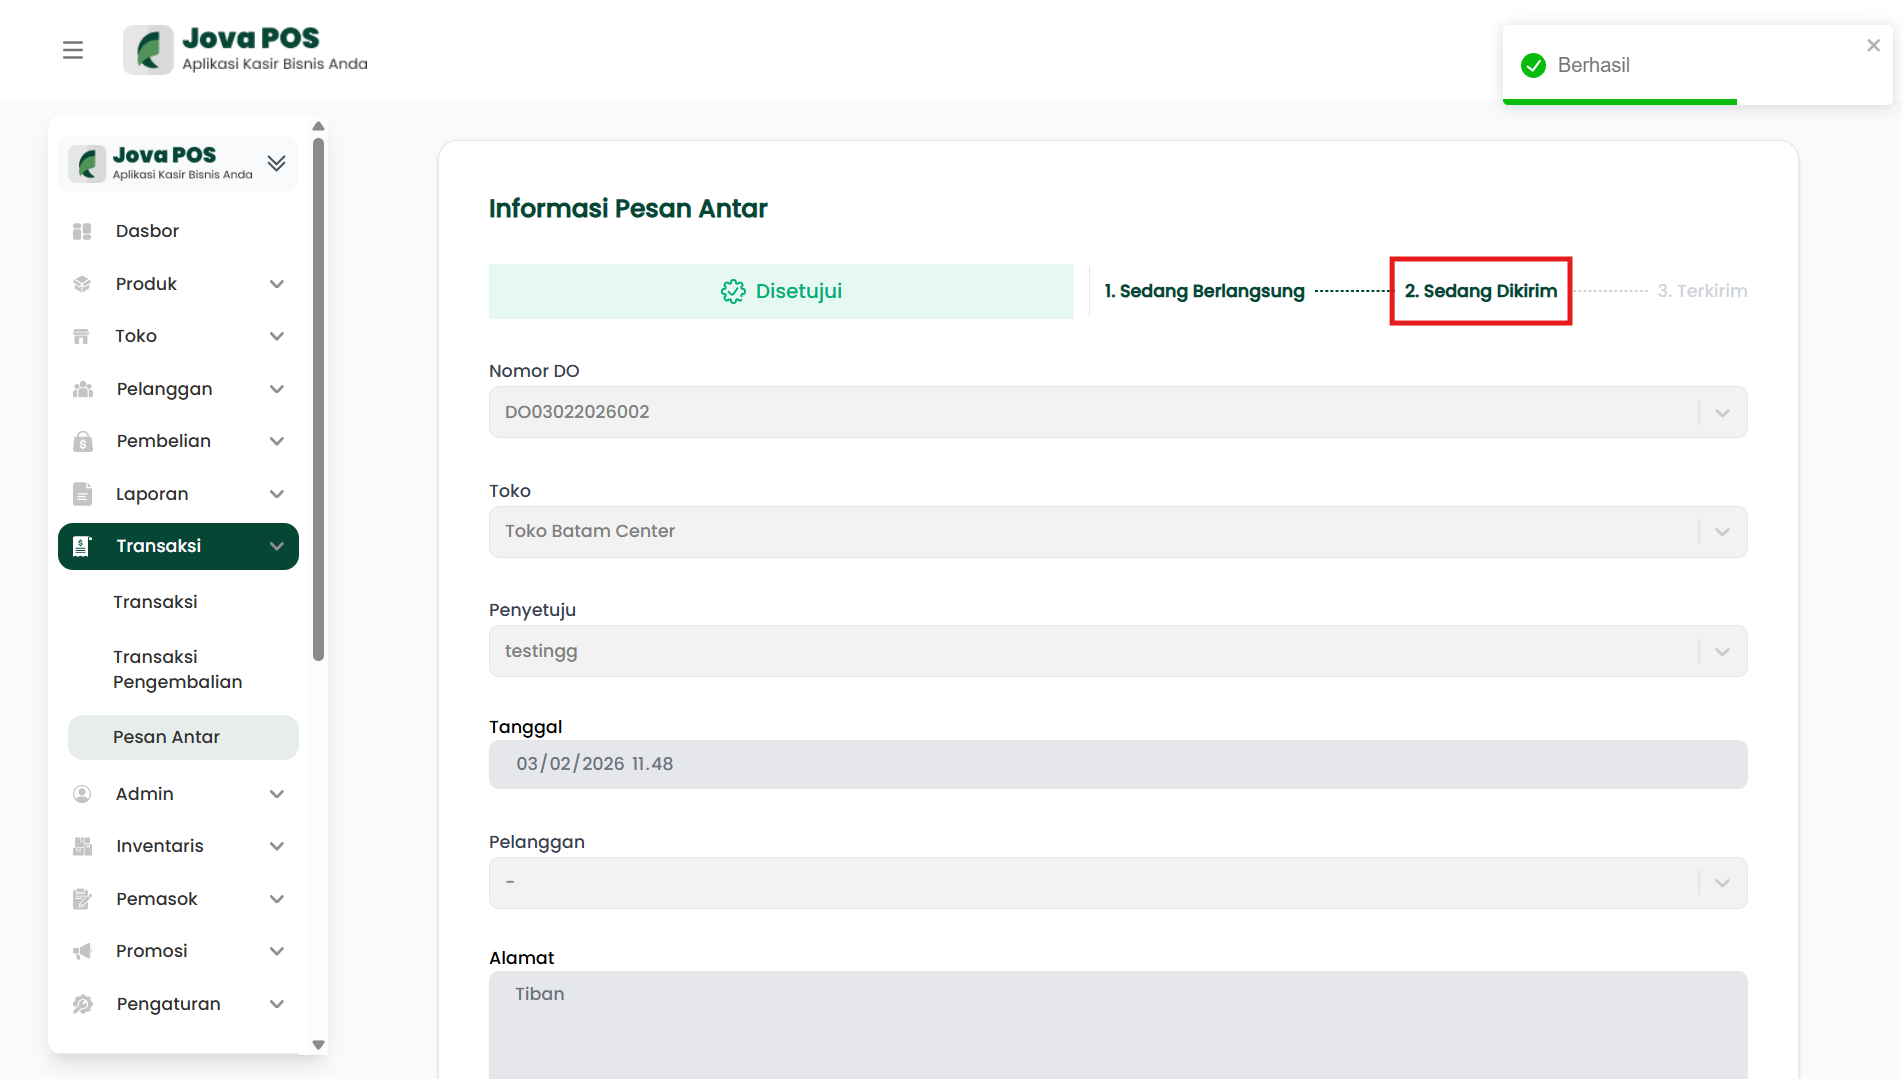
- Click Delivery to start the shipping process.
- The system changes the stage to 2. Being Delivered.
14. Completing Delivery
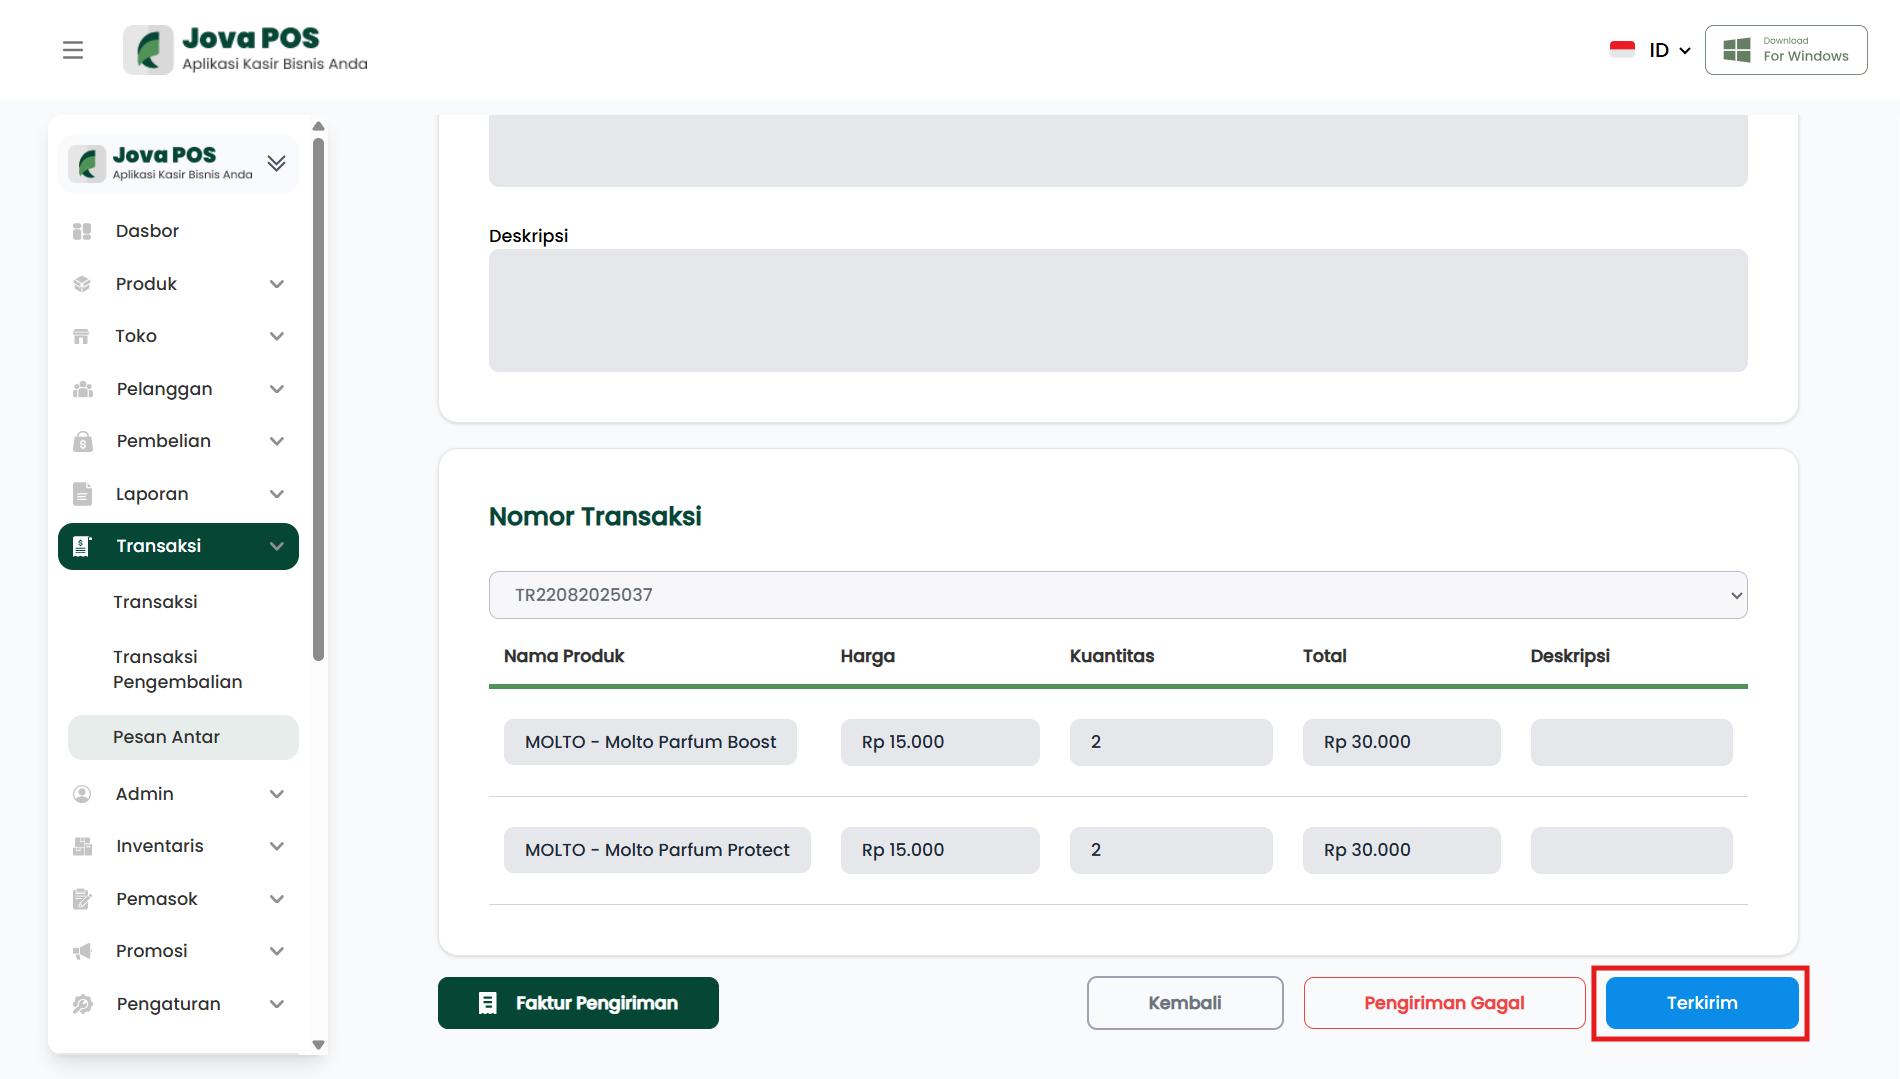
At the delivery stage, the options usually available:
- Delivered: used when the goods have arrived and been received.
- Delivery Failed: used when the delivery was unsuccessful.
Note:
- Use Delivered only after the goods have actually been received.
- Use Delivery Failed if there are issues such as address not found, recipient not available, or other operational constraints.
15. Delivered Status
If the delivery process is successfully completed, the stage will move to 3. Delivered.
In this condition:
- The delivery status is considered complete.
- The DO has reached the final stage and does not need to be processed again.
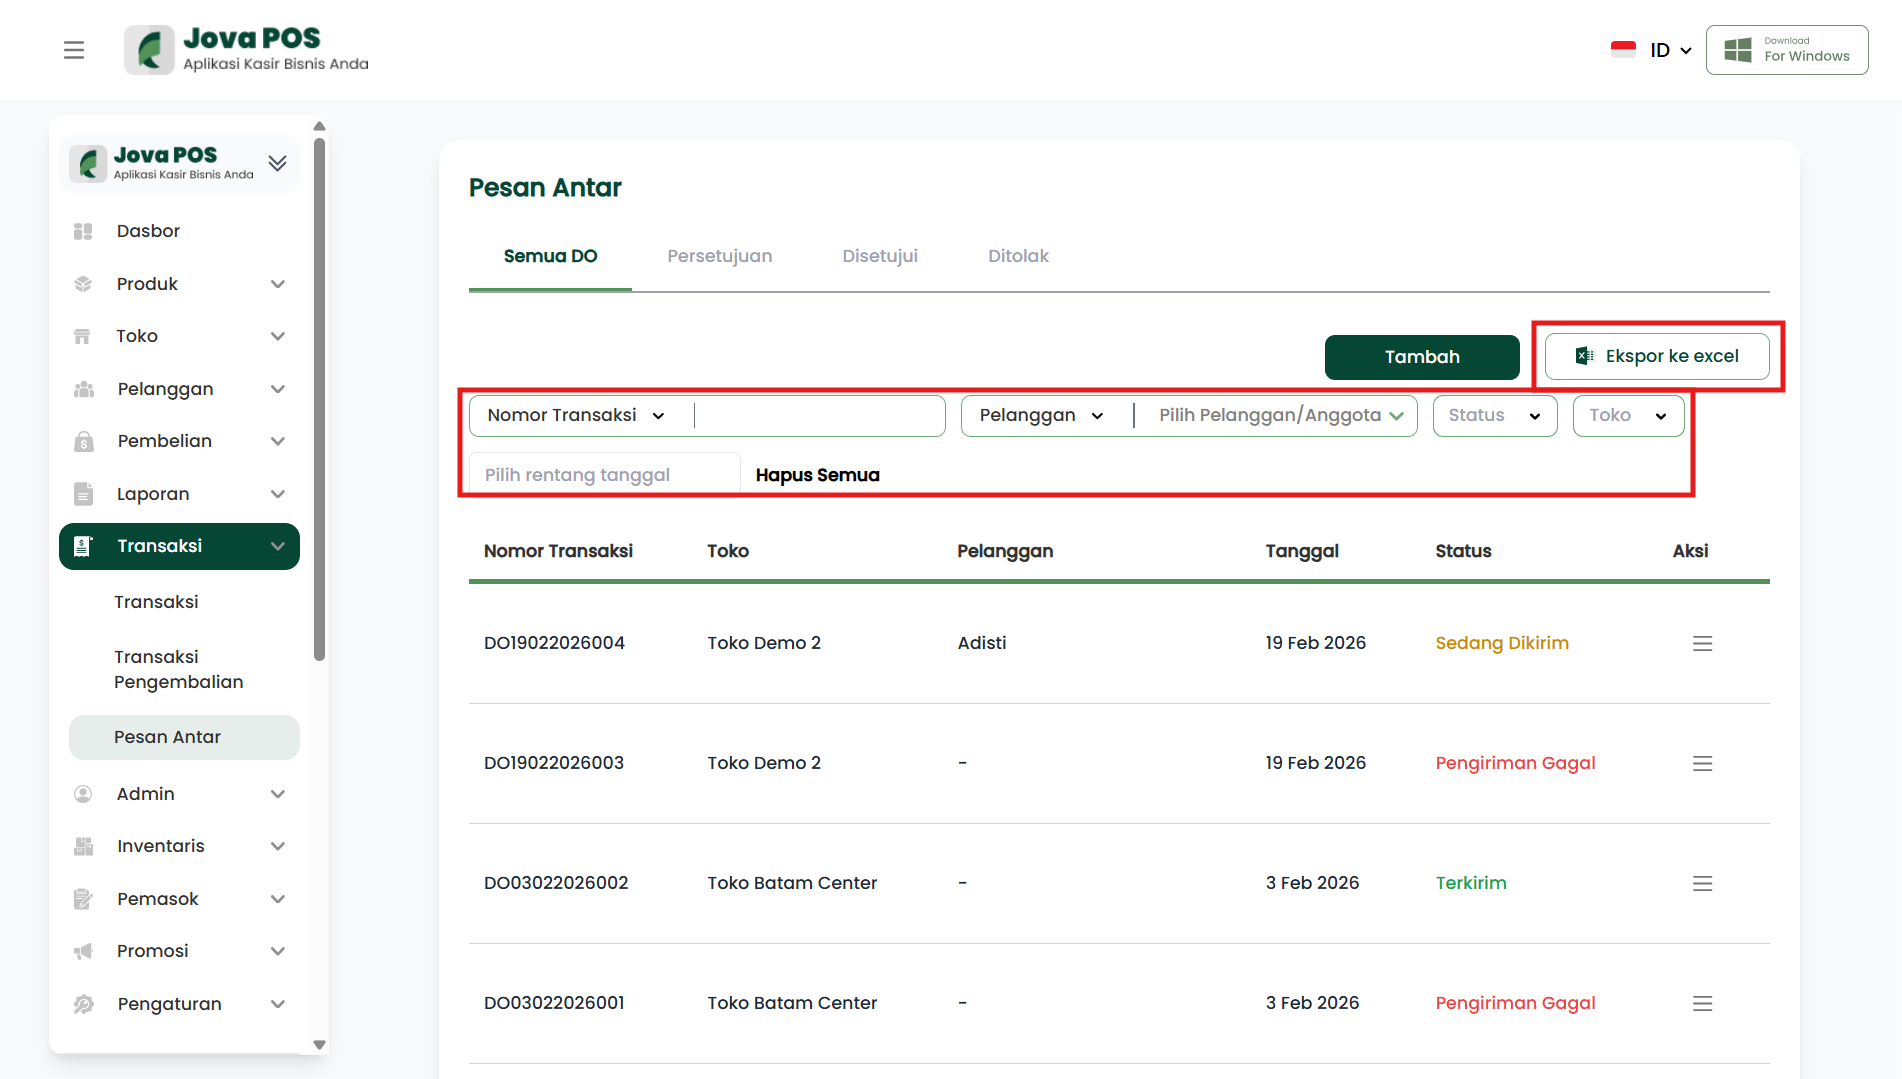
16. Filter and Export Data
On the list page, you can use filters such as:
- Transaction number
- Customer
- Status
- Store
- Date range
If you want to clear filters, click Clear All.
For reporting needs, click Export to excel.
Conclusion
The Delivery Orders feature makes it easy for you to manage product deliveries to customers efficiently. The process from transaction creation, information entry, to delivery status checking can be done easily through the Jova POS system.